$1 Photo Wall Template
/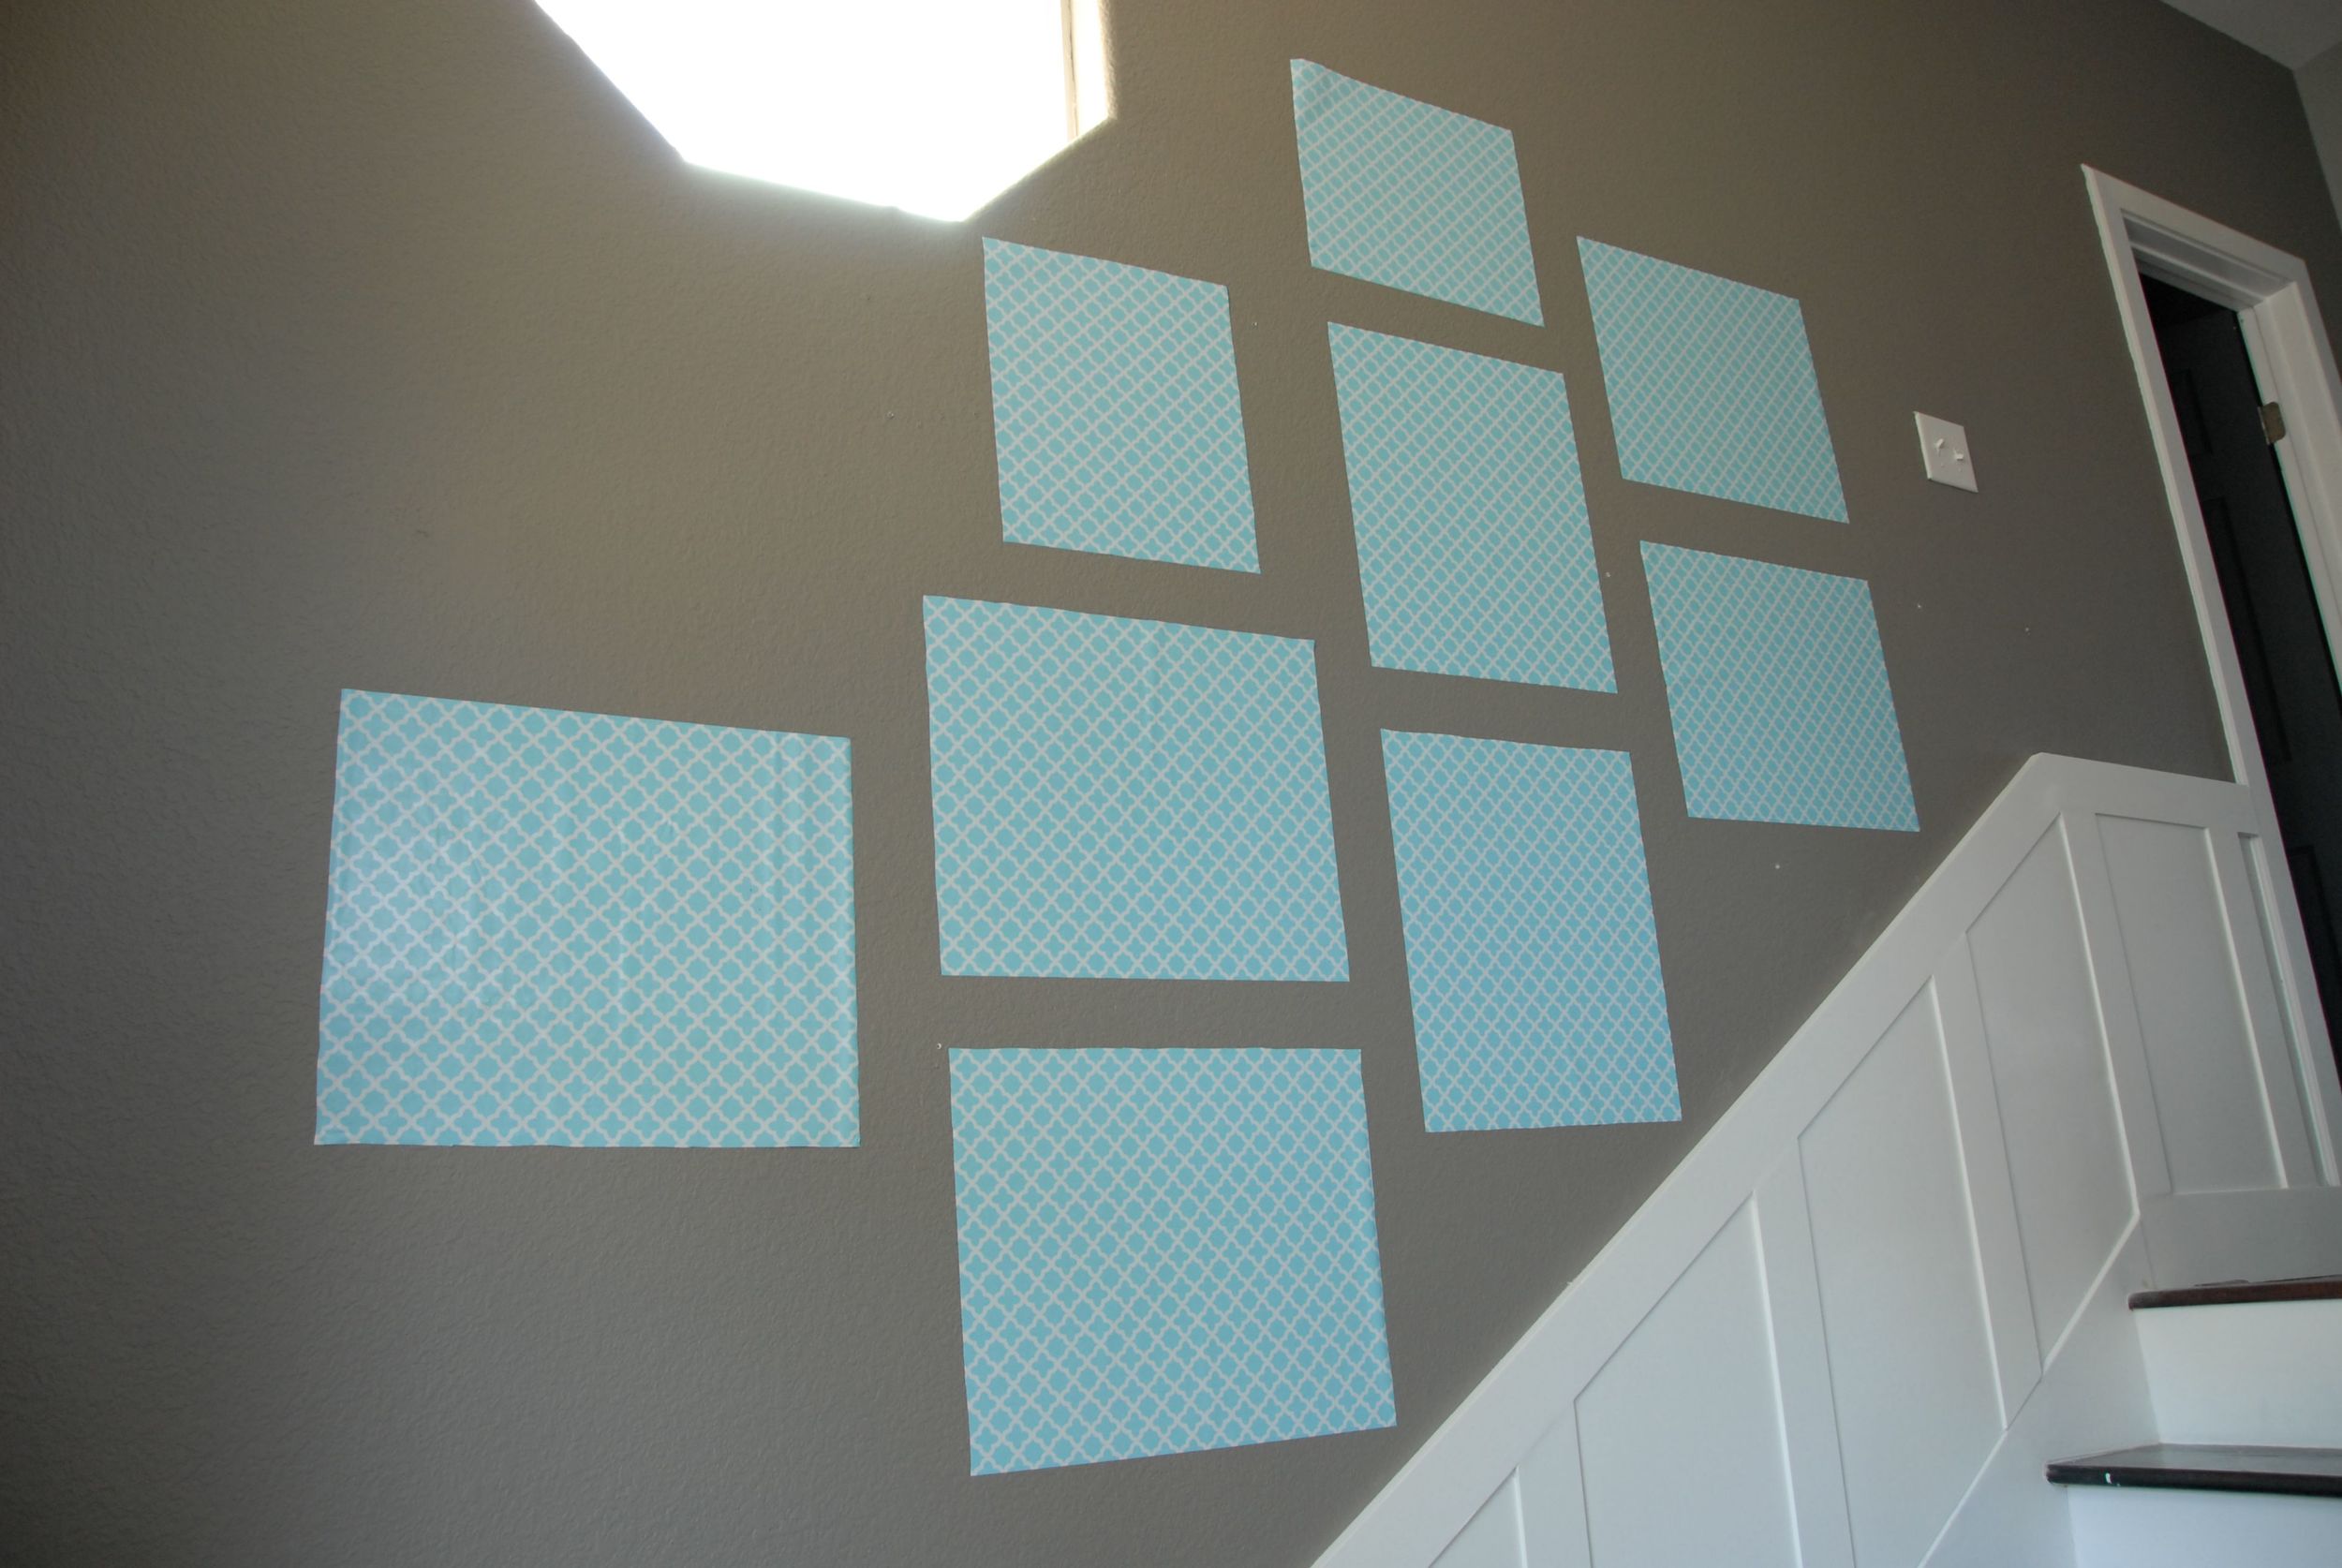
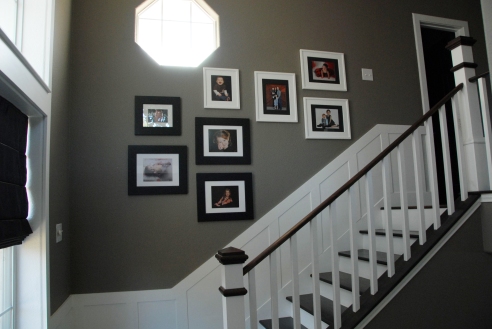
After putting up the board and batten in the entryway (you can check that out here or here), I knew I needed to rehang the photos along the stairs. I've seen those nifty little photo wall template kits that can help you design a layout and gives you the frames. I love the idea, but I already have the frames and I'm too impatient to wait for a kit to be mailed to me. So I grabbed a cup of coffee (to get the creative juices flowing) and had an a ha! moment. I ran down to the laundry room, went through a few boxes of "scraps" from projects and came up with this:
Can you guess what I used? It's contact paper!!!!
A couple of months ago I decided to make paint can labels using contact paper. I went to the local dollar store and bought a 2 roll package for, you guessed it, $1. I still had one full roll and a half roll. I rolled it out, grabbed my frames and a pair of scissors and got to work. I laid each frame on the paper and cut out a square to match the size of the frame.
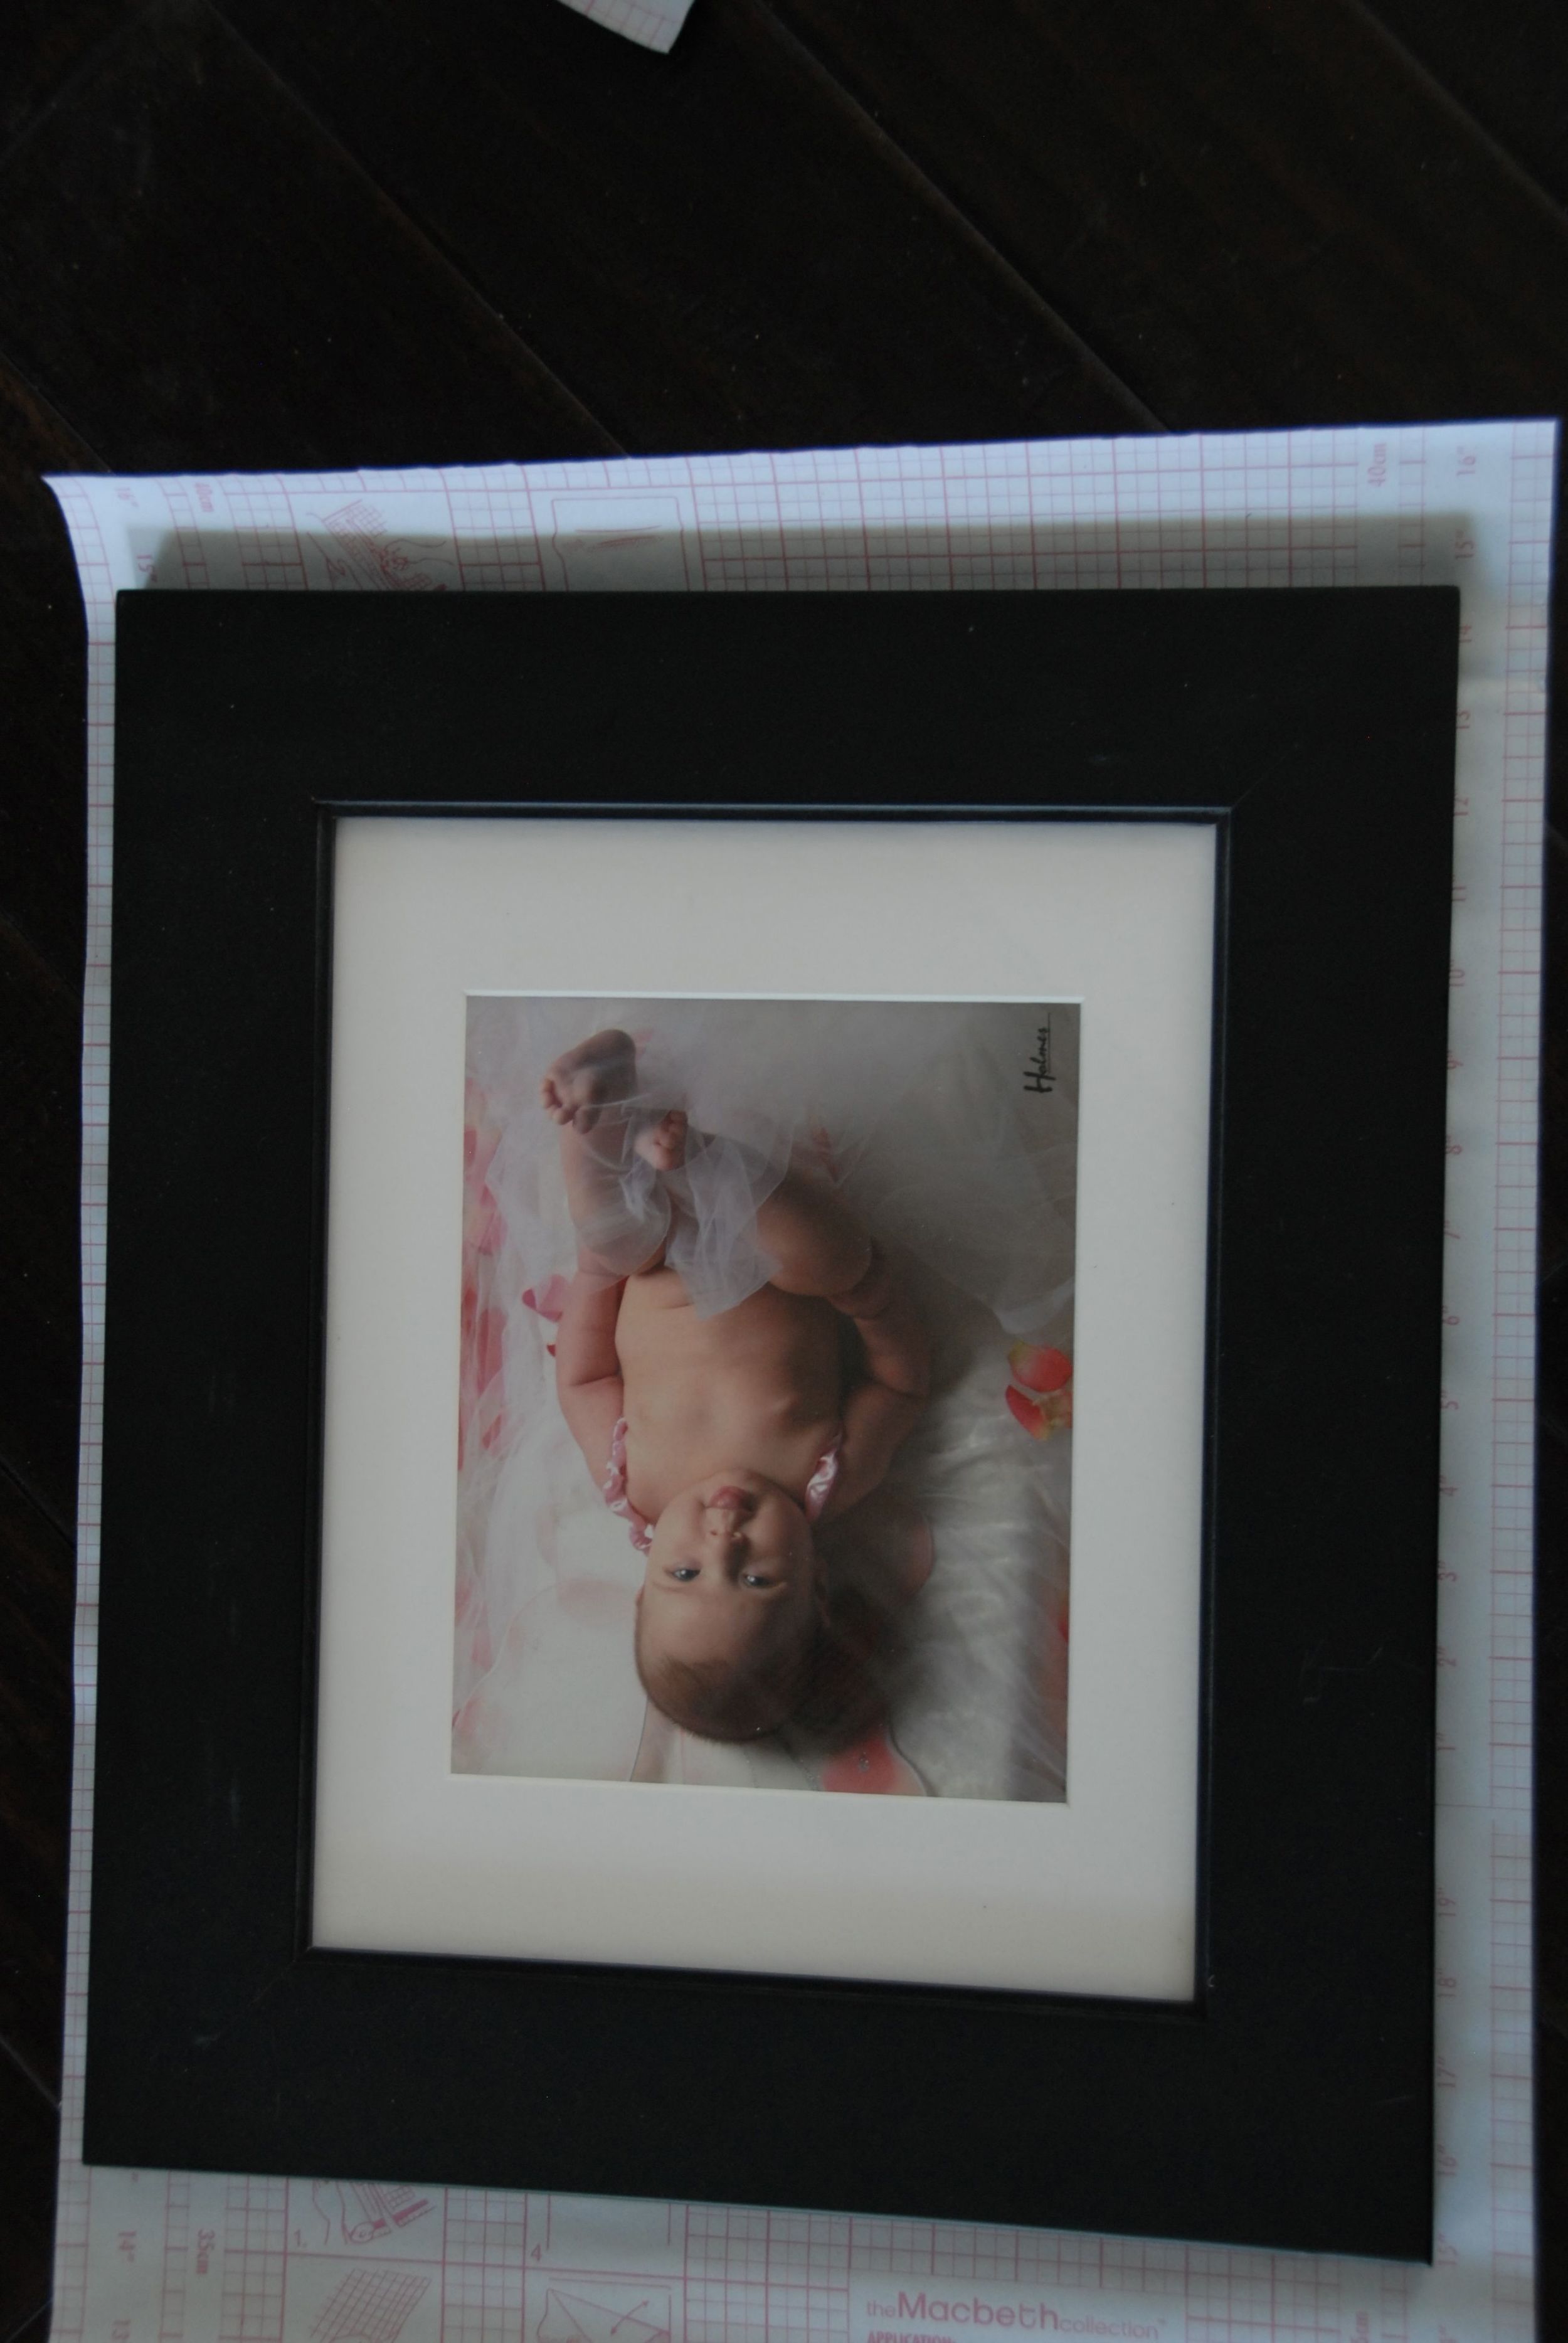
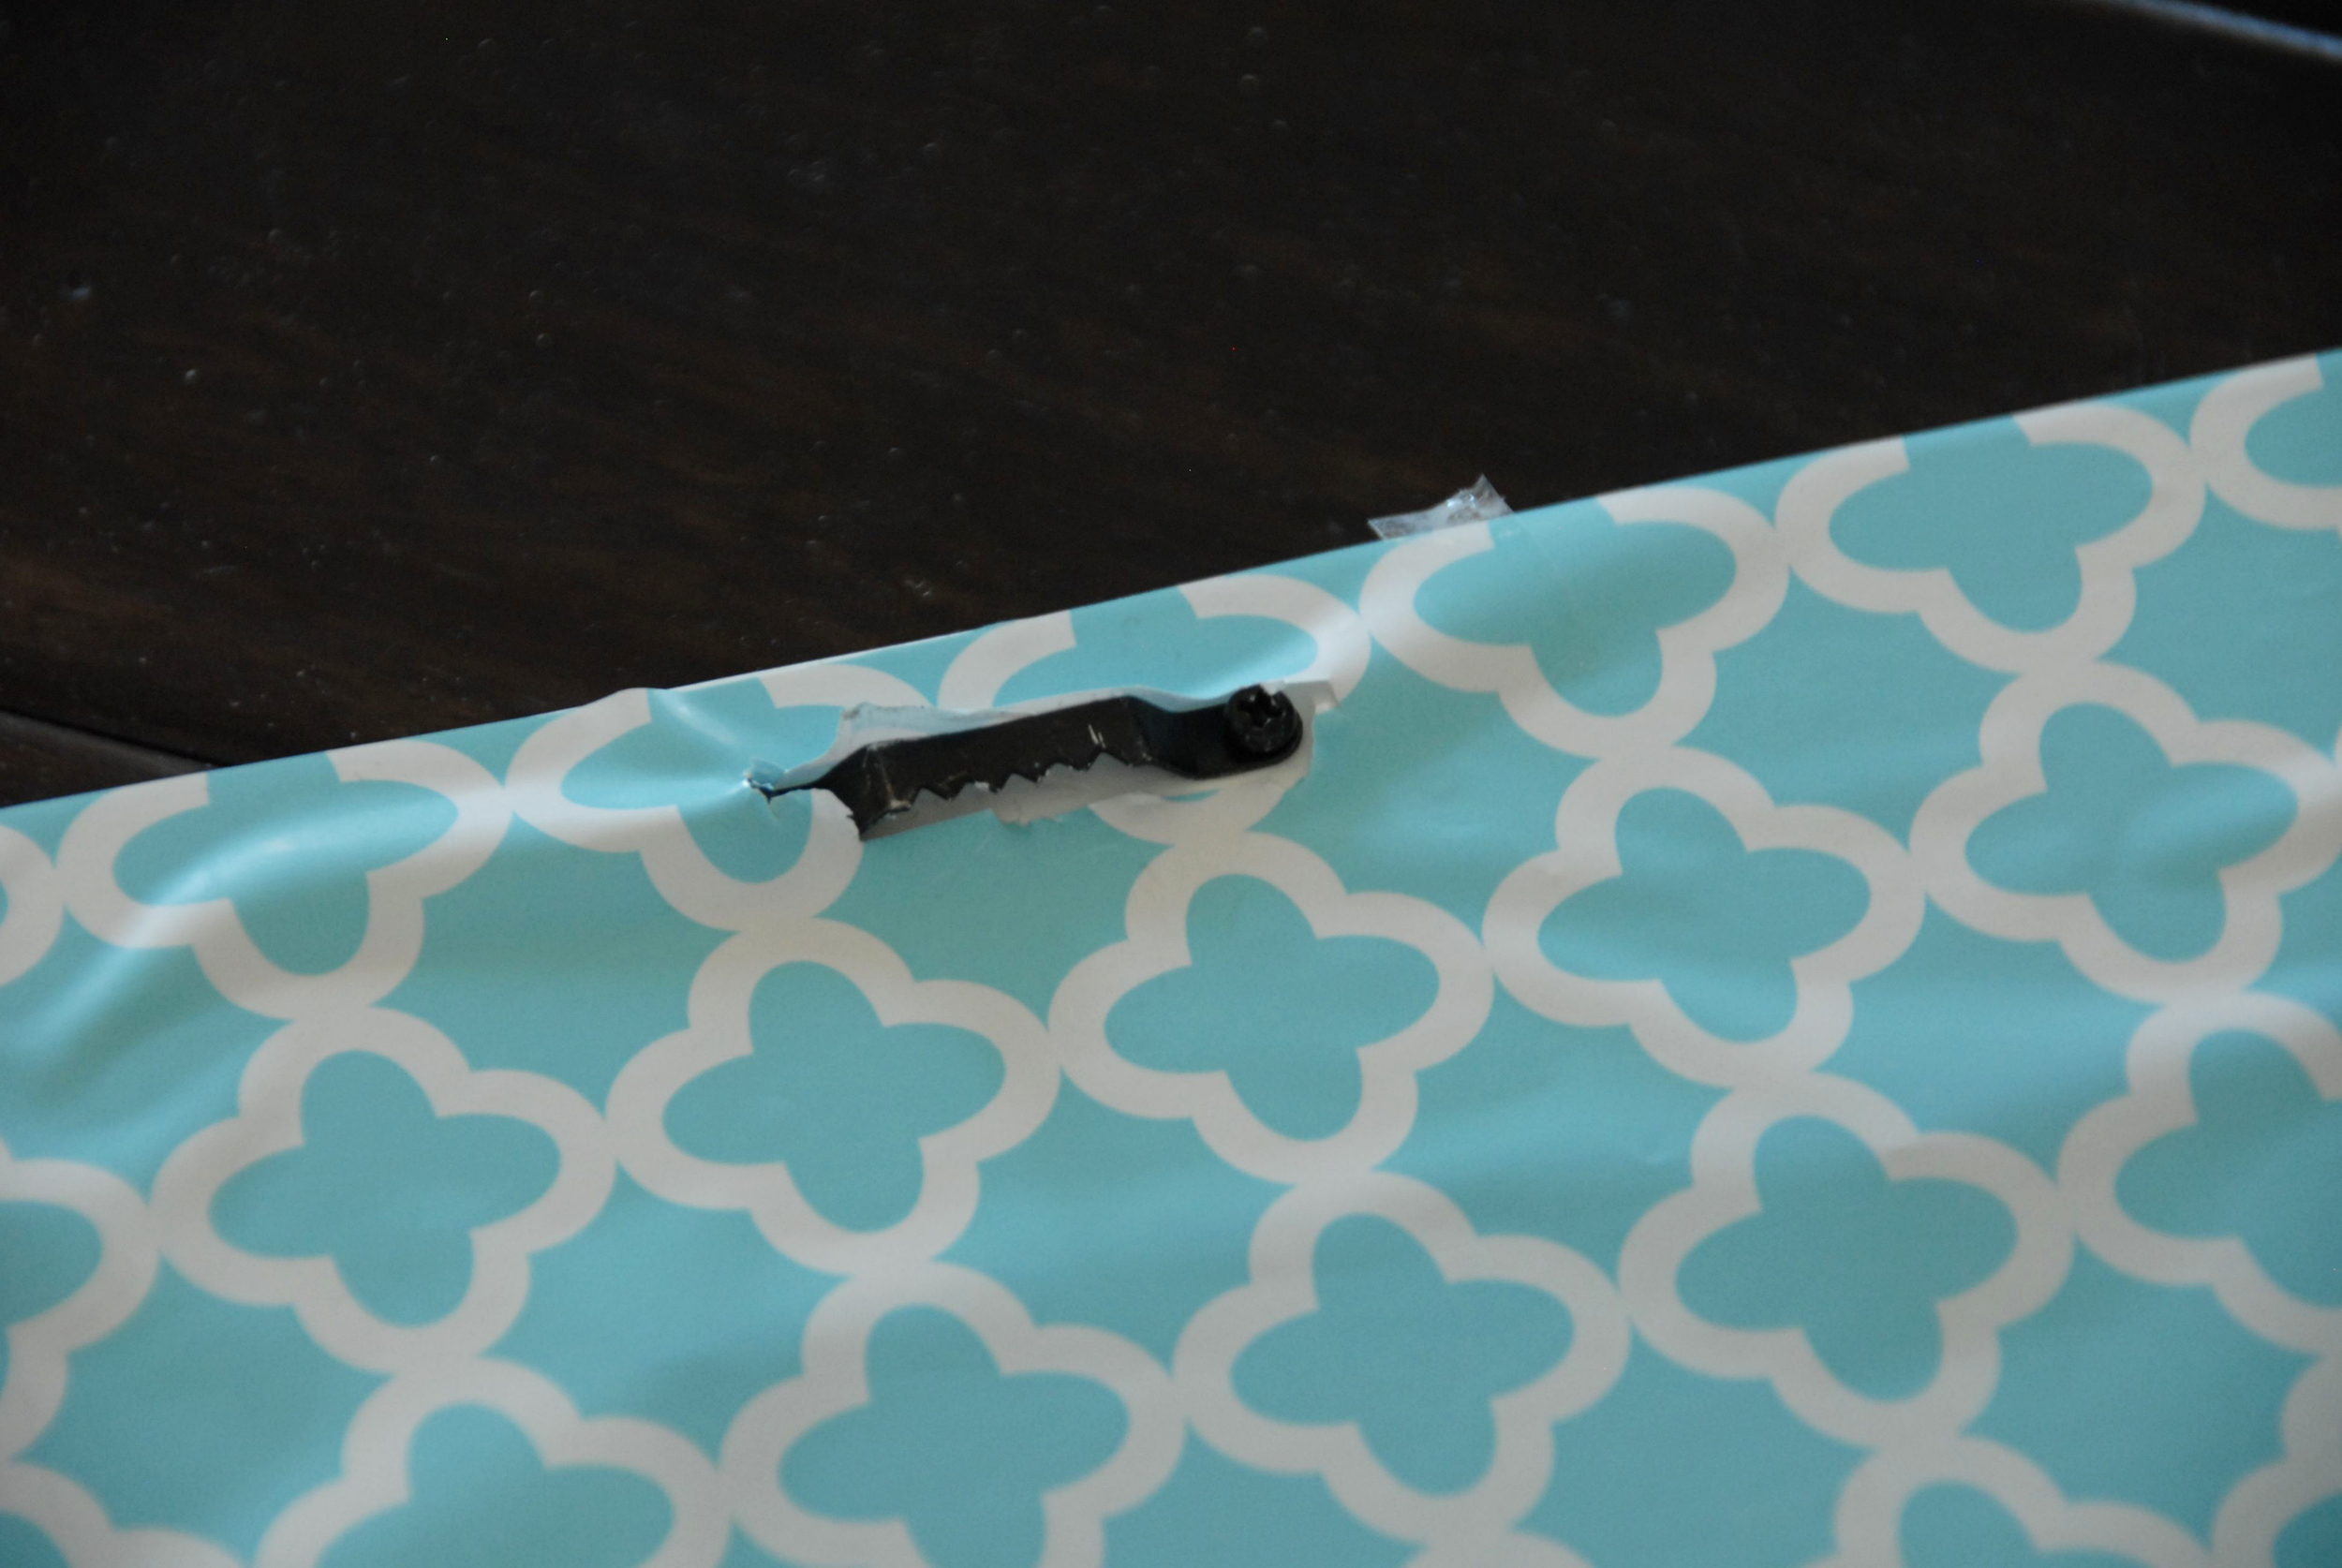
Once I cut all of the squares, I laid them on the back side of the picture frame and cut slits where the hangers were:
Next, I peeled off the backing and started laying out my wall. I probably rearranged it a half dozen times but that is one of the greatest parts of using contact paper - it peels and sticks super easy and without damaging your paint!
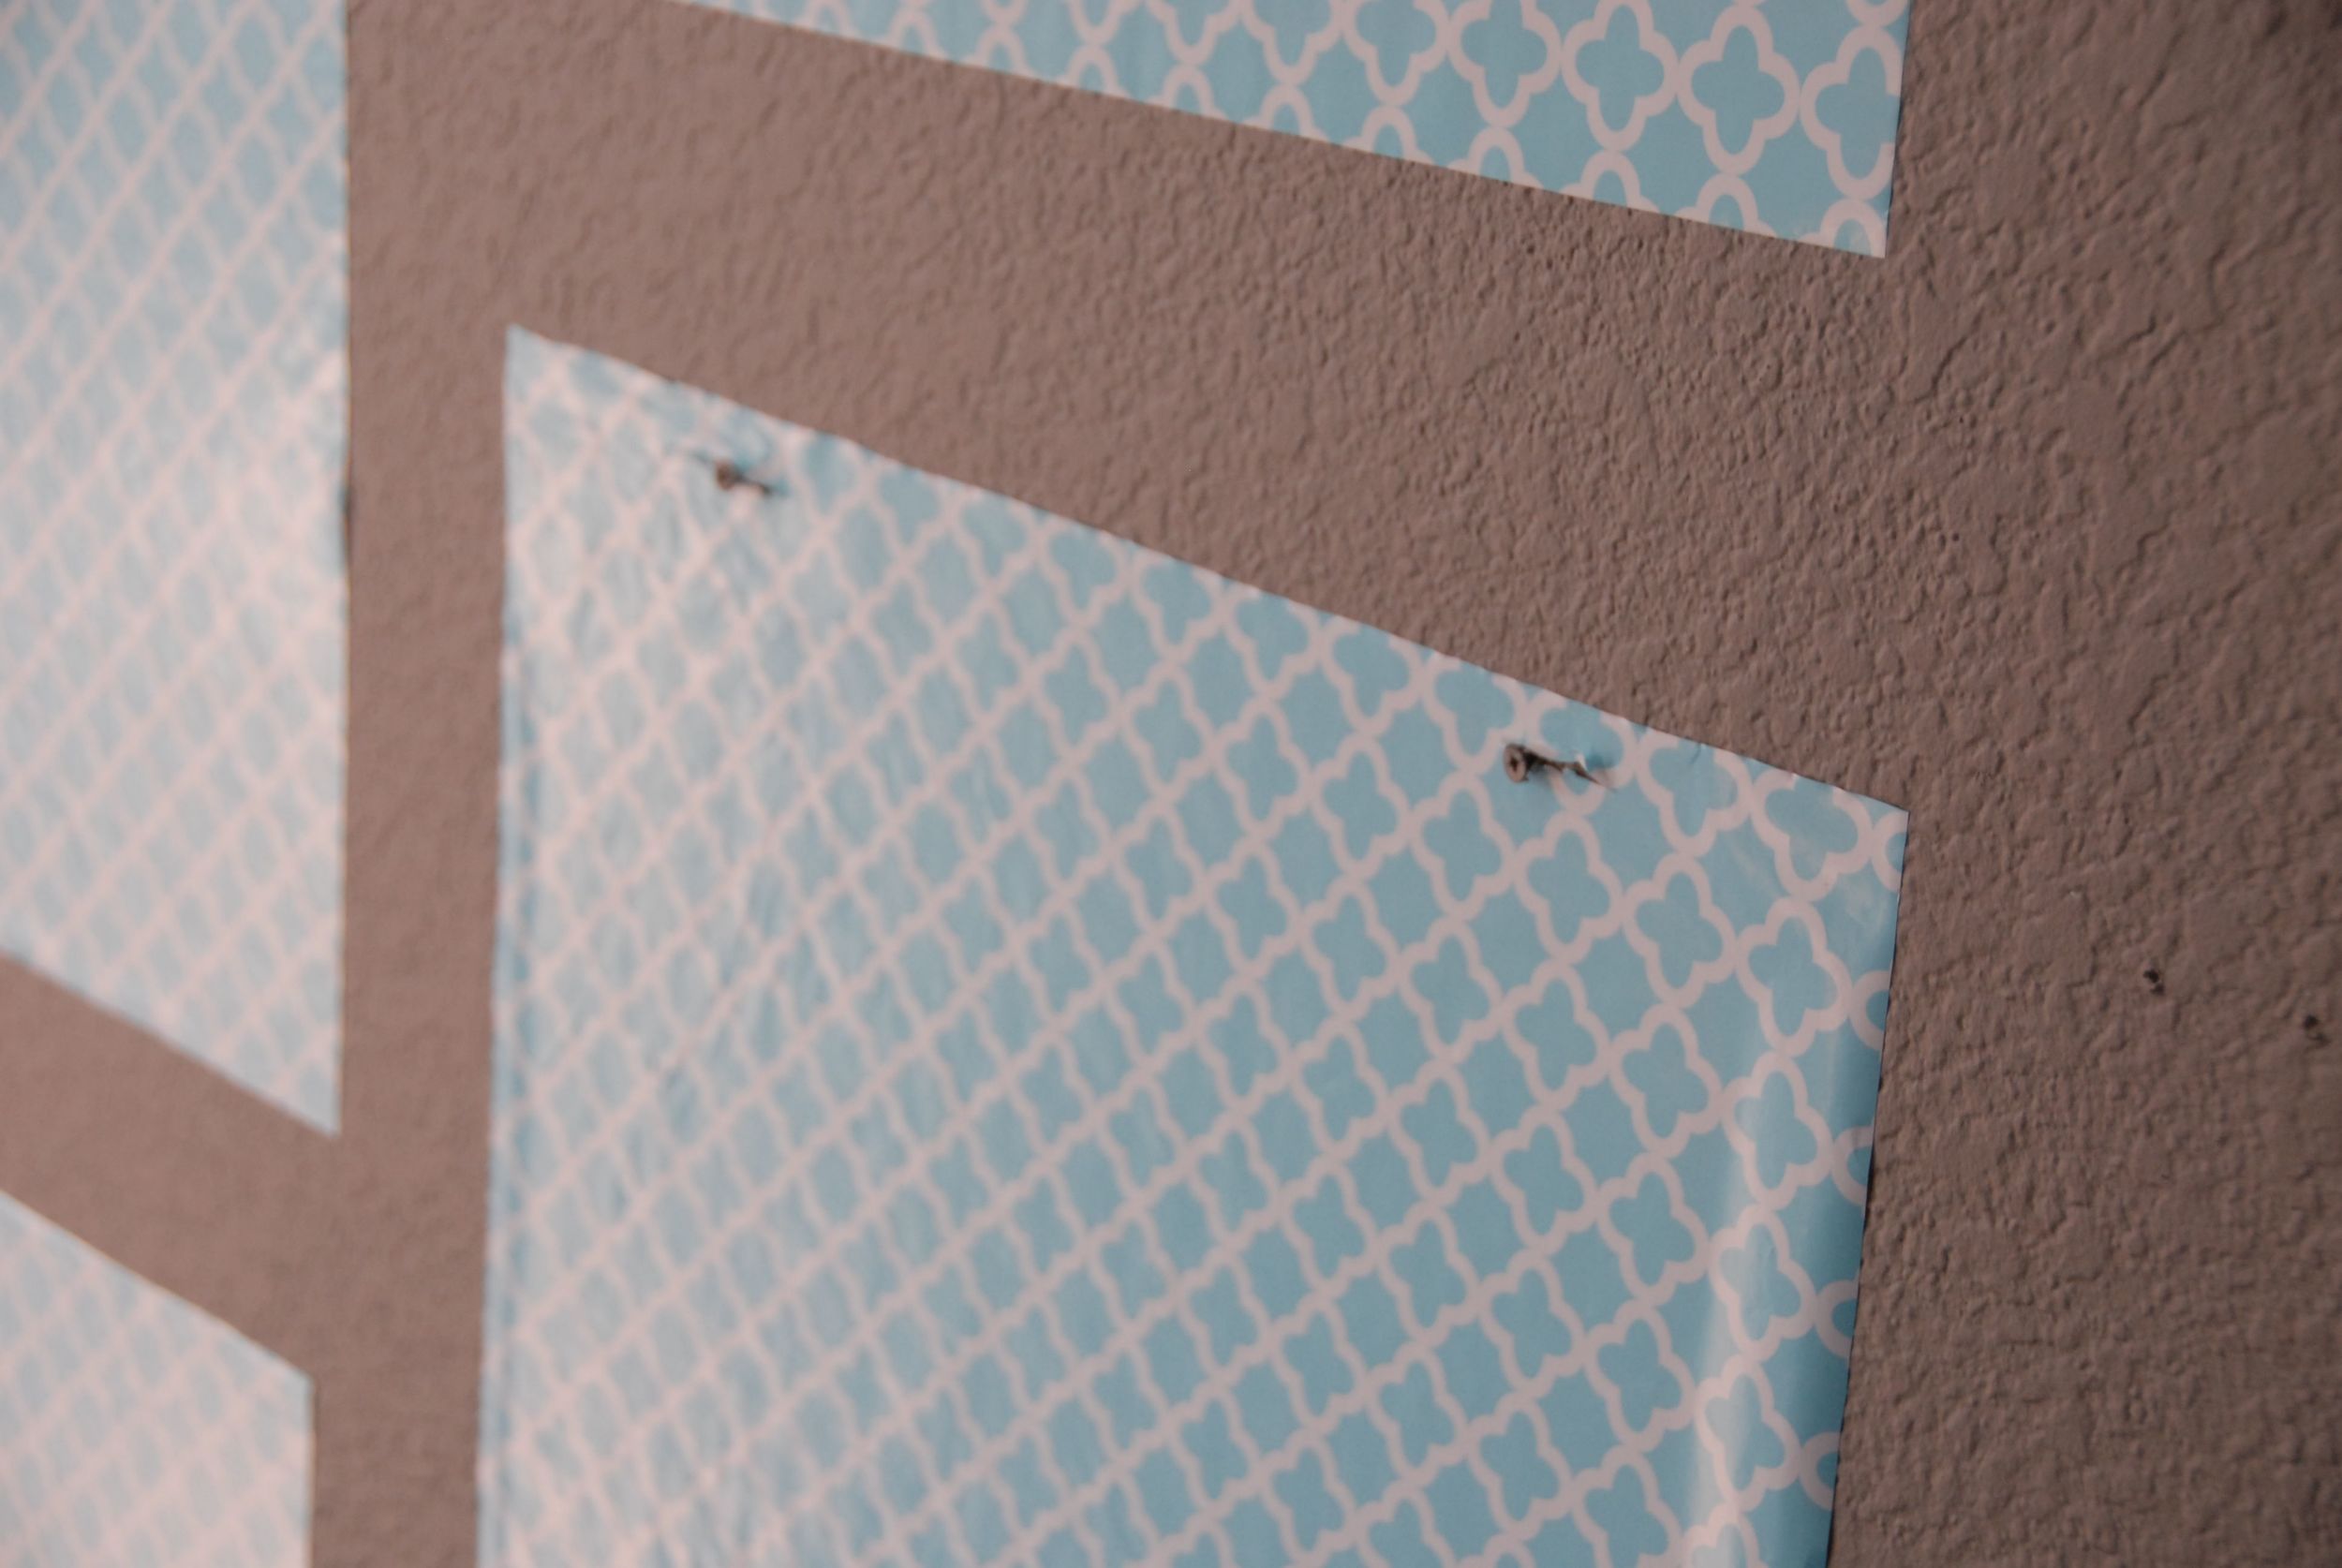
Once I finally decided on a layout, I made sure everything was level and evenly placed and then placed a screw or nail in the slits. I pulled the contact paper off of the wall, hung my prints and voila! I laid out a photo wall for only $1!
YOU MAY ALSO ENJOY:


