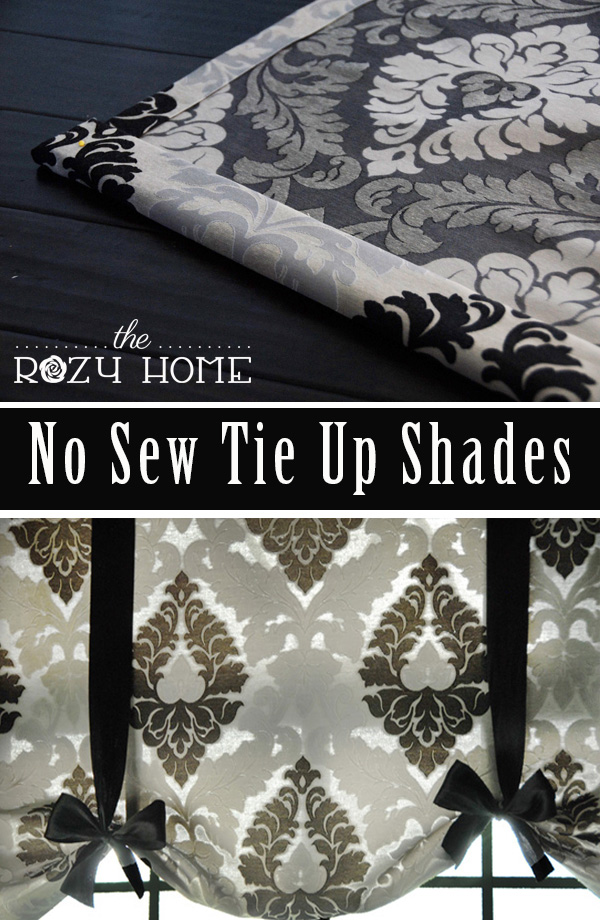
No Sew Tie Up Shades
/
Update: I used this tutorial on my kitchen shade and found that using Stitch witchery or Hem Tape worked better. It made the seams less rigid and gave the curtains a more natural hang.
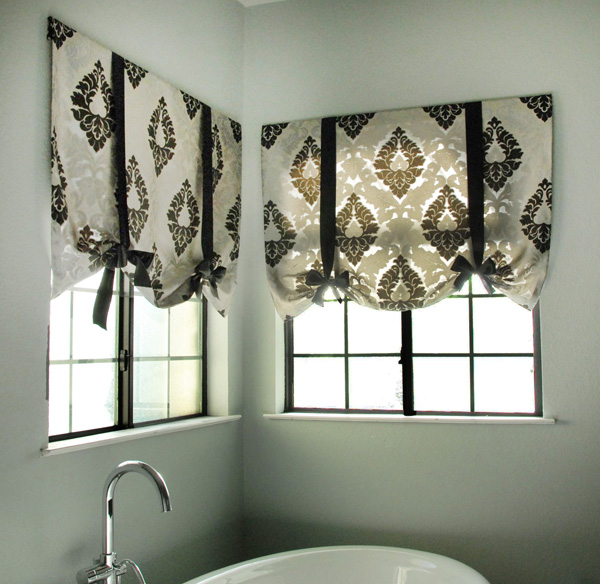
One of the things I've been struggling with during the bathroom remodel is what to do with the windows. They are frosted privacy windows, but I noticed the other day that you can see outlines really well - which means when I'm taking a bath the neighbor could get an eye full! Yikes! Before the bathroom remodel began the hubs told me I could do anything I wanted, "it's your room, do what you want" to be exact. Woo hoo! Since I love France so much I decided to make this my little Parisian getaway. Not the overly formal Paris, but the more relaxed Paris that you see today. After more time on Pinterest than I want to admit I decided tie up shades or london shades were the best option. They give the feel I want without being too stuffy. I looked at tons of sites selling both tie up shades and london shades and could not find anything that I like. So I decided to get creative.
I grabbed some scrap fabric I had laying around and experimented with a few different things until I came up with a tie up shade I loved. It took about 30 minutes to make the shades and I'm loving the look. They are just what the bathroom needed!
What You Will Need
Fabric
Iron
Fabri-Tac (use can also use stitch witchery or hem tape)
Ribbon
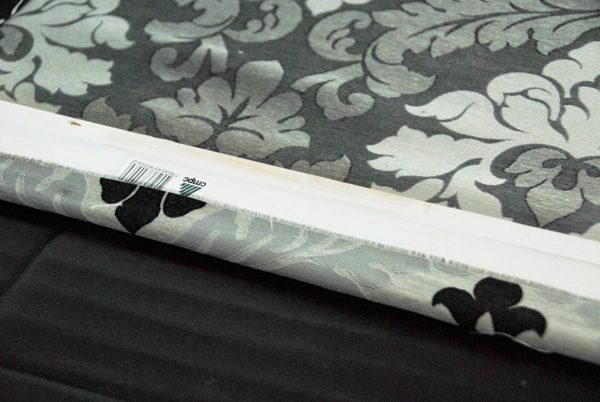
1 X 2 piece of wood or scrap wood (I used old casing)
The amount of fabric and ribbon you need depends on how big your windows are. My windows are 44 inches wide and I made the shade 40 inches long so I ended up using 3 yards of fabric and 2 - 3 foot spools of ribbon.
Step 1: Measure your windows
Measure the width of your windows from edge to edge. Add an additional 8 inches to the measurement (This will make the final curtain 4 inches wider than the window. This was a good width for me, but you can make it wider or narrower as needed. Just be sure to add at least 4 inches to account for seams).
Step 2: Determine the length you would like the curtains
My window is 48 inches long so I thought 40 inches without seams would work. Just keep in mind you will end up with 4 inches being used for the bottom seam and 4 to 6 inches for the top seam so add around 8 to 10 inches to the desired length to account for seams.
Step 3: Iron the fabric
Ugh... I.hate.ironing! But when it comes to making curtains or drapes, it is a necessary evil! Place the fabric wrong side up and iron the fabric. Ironing will help get the true size of the fabric (after the wrinkles are out the fabric is wider) and you don't have to worry about the final curtain being too narrow (I learned this one the hard way).
Step 4: Cut the fabric
Cut your fabric based on your measurements.
Step 5: Create the seams
Ok... this is where the most amount of work comes in. Luckily it's super easy and not nearly as hard as you may think.
Make sure your fabric is still laying wrong side up.
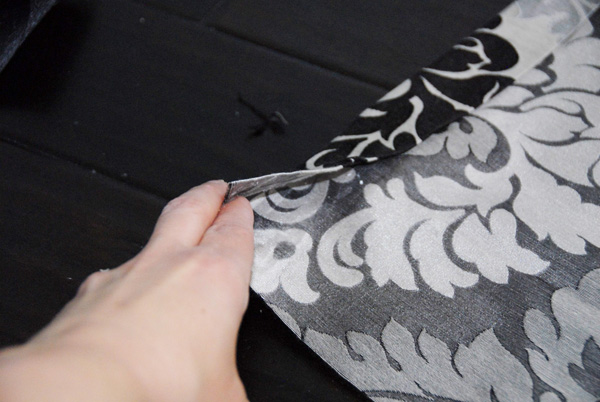
Fold the right seam in one inch:
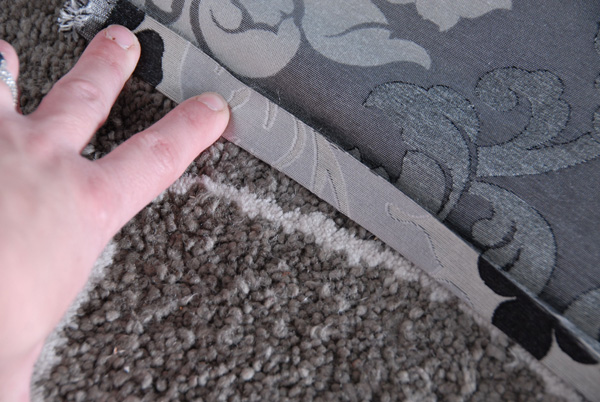
Press the seam the entire length of the curtain.
Fold the seam in another inch and press.
Unfold.

I did this step so I could easily see my seams - which helped keep them from getting messed up when I applied the Fabri Tac .You should see the fold lines and should have to hold the fabric down to keep it from folding back up.
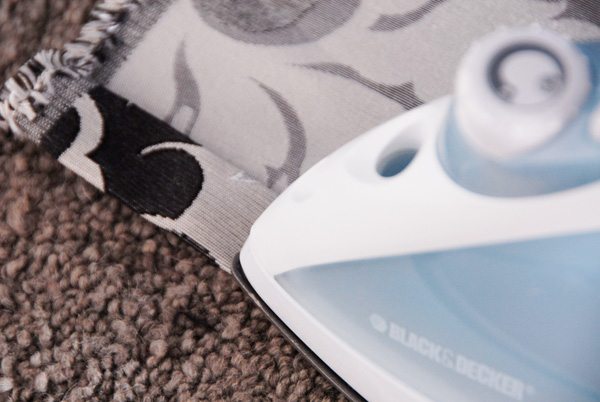
Grab your Fabri-Tac and and place a bead down the entire length of the outermost fold.
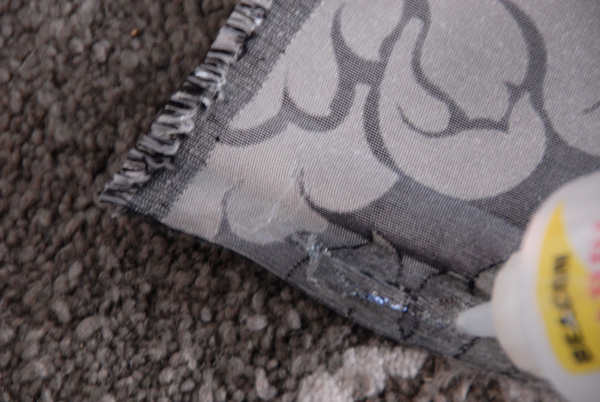
Allow the fabric to fold over and press firmly (with your hand) on the seam. Fabri-Tac is flammable so do not press with your iron!
Starting about 2 inches from the top, place a line of Fabri-Tac along the length of the fold.
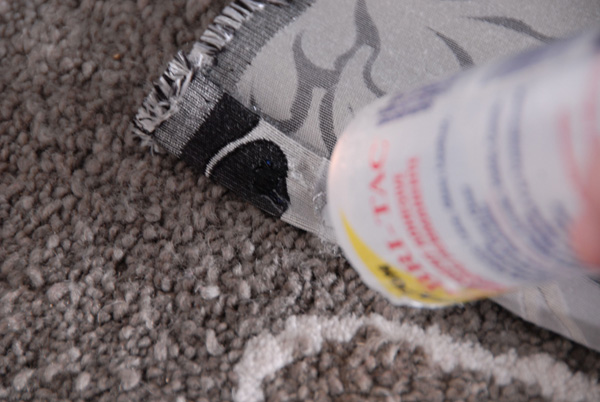
Fold over and press firmly with your hand along the seam.
That's it for the right side! Now just repeat the steps for left side.
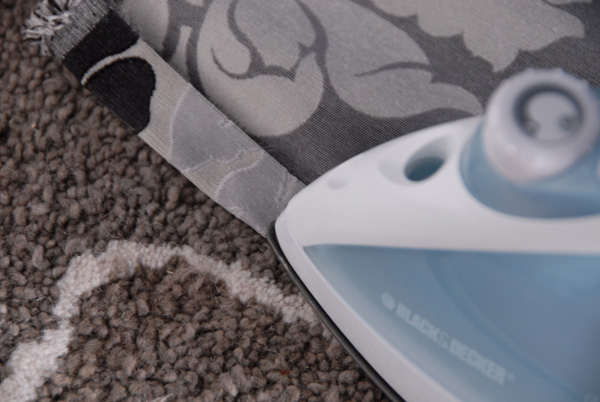
Now for the bottom...
Fold the fabric over one inch and press.
After pressing the first fold, fold the fabric over 3 inches and press.
Unfold the fabric and glue the folds like you did on the side seams (outermost fold first).
That's it for the bottom seam!
Now, here comes the fun part. :-)
Step 6: Create the header
Measure the finished width of your curtain. Subtract 1/4 inch and use this measurement to cut your wood.
Once you've cut your wood, place it about 1/2 inch from the top of your fabric and inside the top pockets of the left and right seams. If you use casing, make sure you lay it finished side down. *I tried to photograph every aspect of this and absolutely forgot to take a photo of the wood before I created the first fold!!! Luckily all of you are brilliant and don't need a pic of that. :-)
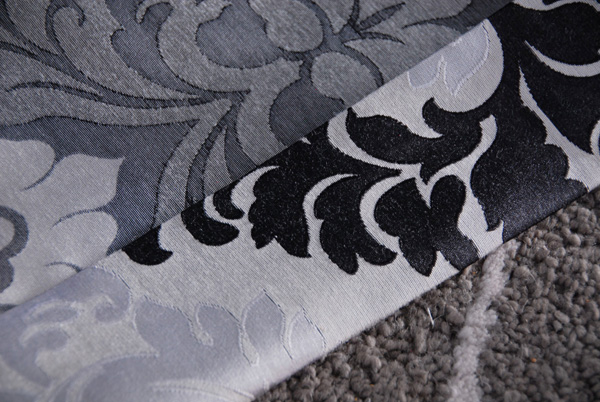
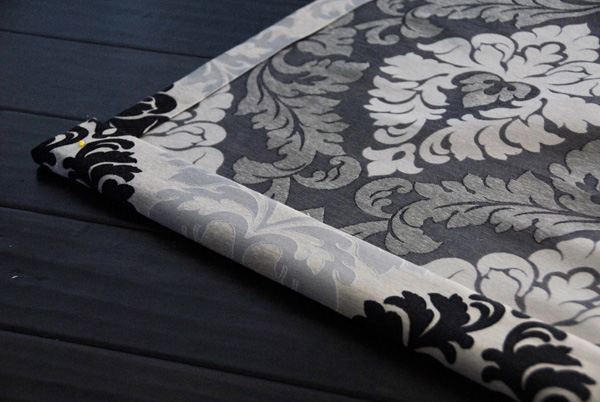
The top pockets created on the left and right seams (the reason why you glued two inches from the top on the last fold). When looking at this picture, I am holding up the fabric on the side seams to show the pocket that was created.
After inserting the wood into the pockets, place a bead of Fabri-Tac along the edge and fold the fabric over.
Place Fabri-Tac on the board and then fold the board over. It should resemble the photo below:
Optional: Fold the board over one more time. I didn't do this on my last curtain and it was fine.
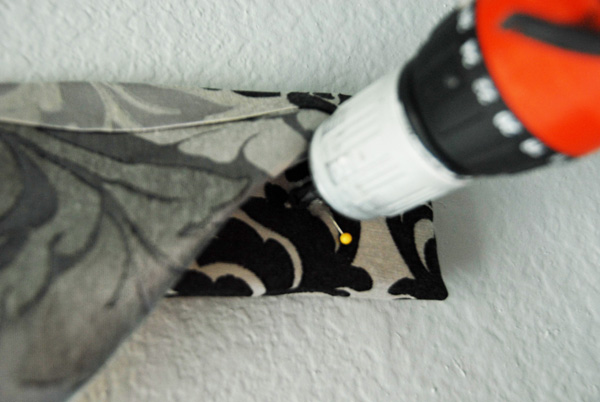
Step 7: Drill mounting Holes
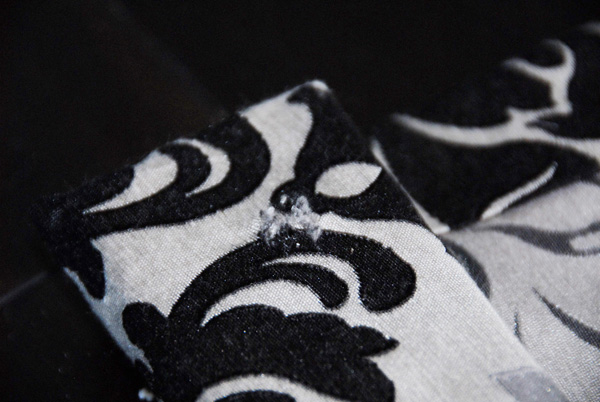
Make sure your curtain is laying exactly like mine is in the photo above.
Determine where you want your mounting screws to go on each end (I decided to use a pin to mark the spots).
Using a 5/16 drill bit, drill a hole through the backside of the header (note: your shade should still be laying wrong side down in this step as in the above picture). I would recommend holding the header off of the floor and holding the fabric tightly so it doesn't get messed up when you are drilling it.
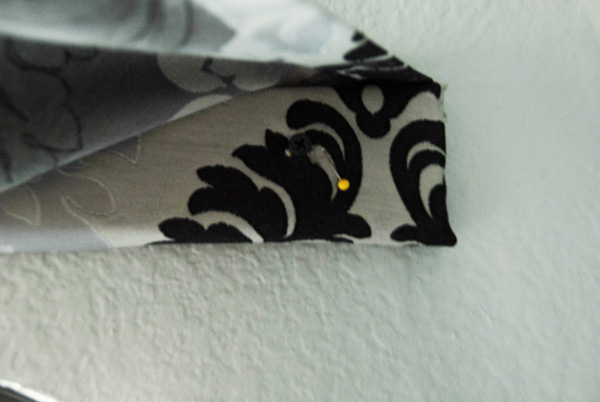
Now that you have drilled the hole, fold the fabric over the header. This should create a canopy.
Note: This part has been confusing for some people. In the picture above, imagine picking up the header as it lays. When you do this the fabric is hanging dow. As you can imagine, you can't screw it into the wall because the fabric would be covering the hole. You don't want this. You want to take that fabric, lift it up and fold it over so that it is wrapping over the header. Additionally, you could just place the header flat against the wall and lift the fabric up to attach the header. I personally liked the look of an extra fold. To make it even easier (and what I did on my kitchen shade) you can attach L-shaped mounting brackets. You simply mount them on the back of the header and attach them to the wall.
Step 8: Mount the curtains to the wall
Using drywall screws, mount the header to the wall. Don't screw it in completely so you will have room to thread your ribbon.
Step 9: Add ribbon
Thread your ribbon over the top of the curtain. Cut to the desired length.
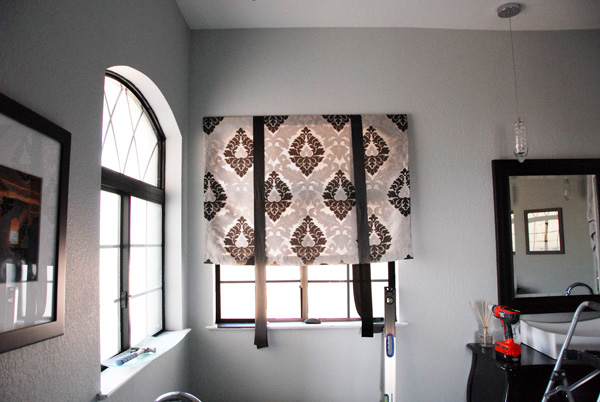
Tie the ribbon at the desired length.
Tighten the mounting screw and voila! You have a no sew tie up shade!
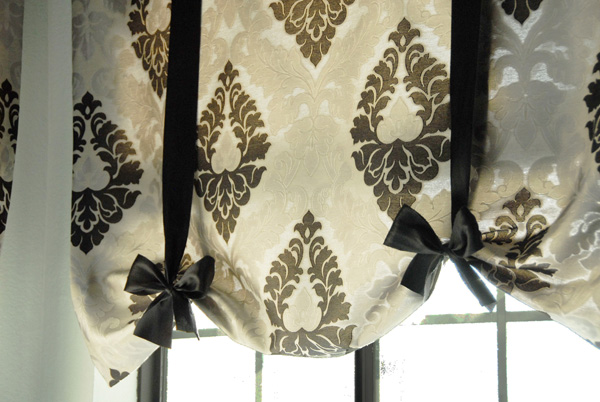

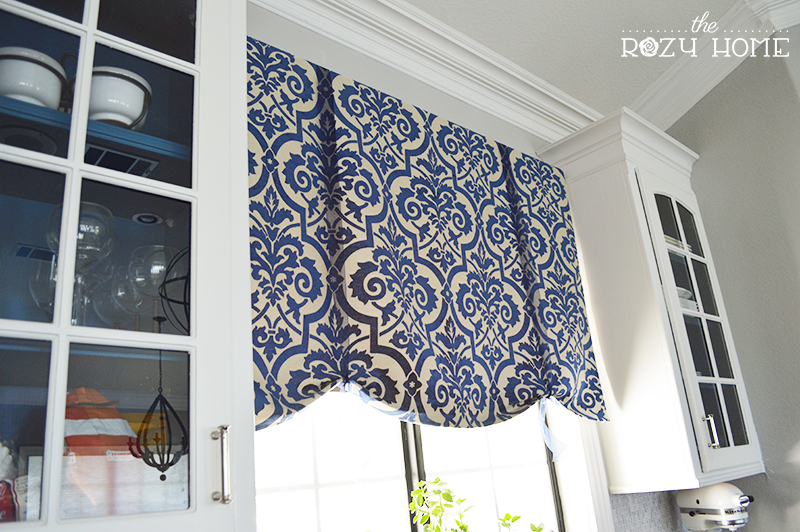
The Tie up shades in the kitchen. i used organza ribbon and a simple knot.
I worked on those darn bows for hours because I can't tie a bow to save my life. After a couple of hours I got them tied but then noticed one side is higher than the other. I'll fix it - just not now. I'm tired of messing with bows!!
The entire project cost me about $65 total for both windows:
Fabric: $45 for 3 yards (Hancock Fabrics. It was on sale for 50% off)
Ribbon: $7.99 for two spools (Hobby Lobby. It was also on sale for 50% off)
Fabri-Tac: $13 for a big bottle
Wood: $0 because it was scrap casing, but you can buy some for about $5.
Truth is, this project didn't cost me a dime because everything I used I already had laying around the house, but it bugs me when people say "this project only cost $15" and it's because they used stuff they already had. I want you all to have a realistic idea of what it would cost to do this if you didn't have any of the materials.
I hope this helps all of you. I think I should let everyone know that I am not crafty by nature. I can build and remodel, but when it comes to the crafty stuff, I struggle. You can do this! It is not hard! You do not need to be crafty! If you are worried you won't do it right, buy the cheapest fabric you can find and do what I did - give it a test run. It's super easy and I know you can do it. And once you do, let me know. Send me a link and let me see your work. I'd love to share it with the world. For now, I'm off to get a manicure (the nails are looking a little rough). Have fun!
Check us out at these link parties:


It's That Time of The Year!
Cooler temps are rolling in and fall is knocking on the door. Check out the blankets my clients have called the "best blanket I've ever owned" at a special price for my Rozy Home fans!
The Maia 100% Portuguese Cotton Throw Blanket - Imported from France!
YOU MAY ALSO ENJOY:


