DIY Versailles Planter
/
I am blessed in many ways. I have two beautiful children, a husband I adore and the ability to work from home (which allows me to be here for my kids and blog while earning an income with a full-time job). I am also blessed because my grandparents instilled the travel bug in me at an early age.
When I was six-years-old they told me they would take me to England when I was thirteen. I'm sure they thought I would forget, but I didn't. They kept to their word and took me to England and Scotland the summer I turned thirteen. I loved it. The culture, the people, the HISTORY (I am a huge history buff). As the years went by and my mom became more successful, she made it a point to take her kids on trips. One year she called me and asked "Do you want to go to Paris with me?" I said, "yeah sure, why not." Truth is, I could care less about France but hey, free trip, so why not. And the history... I had to go for the history.
Fast forward almost 15 years and I have checked off about 2/3 of the European countries off of my bucket list. Where have I gone the most? France. By last count, I think I've been to Paris 5 or 6 times now - and I never get tired of it. Every trip I think "this will be the trip where it gets old" but it hasn't happened yet. You see, it was true that I cared nothing about Paris when I was invited to go all those years ago, but once I went, everything changed.
For those who have followed along for a bit, you know my mom carried on my grandparent's travel tradition and took my kiddos to France last summer. Of course I came with (I actually needed to go for business so I piggy-backed on the trip). While there, I wanted to take my oldest to Versailles. I thought she would love it as much as I did - and she did.
Most people go to places like Versailles and ooh and ah and move on. Not me. I walk around and take pictures of things I like. Believe it or not, there wasn't a ton I liked because some of it is pretty over-the-top (although in the case of the Hall of Mirrors, over-the-top is an amazing thing). What do I like? The walls! Check out these amazing walls!
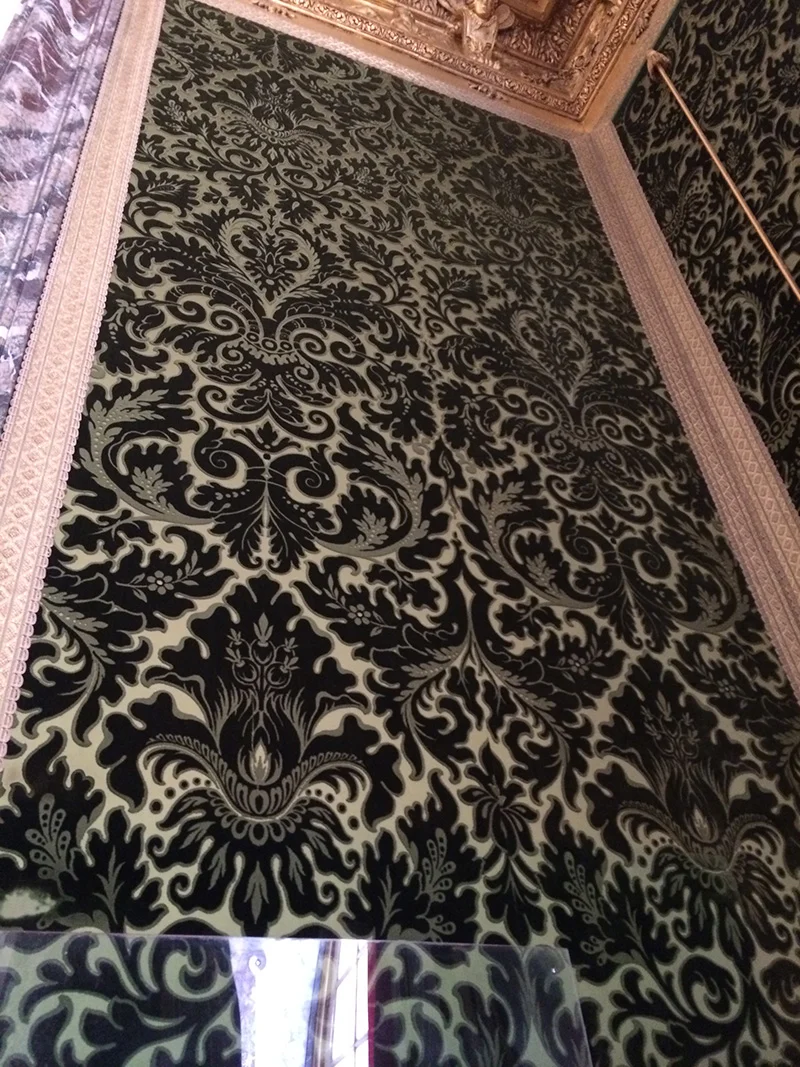
I saw these and the first thing I thought was "and they say gray is just a fad!".
After touring the inside we made our way outside. While walking the grounds we marveled at the beauty of the landscape. I loved the trees and hedges. But do you know what caught my attention?

Yes, a trash receptacle (and yeah, I took a picture of a trash receptacle. I'm a dork that way). I saw it and thought "that would make a cute planter." I love the Versailles tree boxes, but I'm not planning on putting trees in boxes. It's just not my thing. When I got back home, I decided to take a clue from the receptacle and created planters for the front of the house.
Materials:
8 - 3.5" x 6' Cedar Dog Ear Fence Pickets
1 - 2" x 2" x 8' furring strip
2 - 1" x 3" x 8' furring strips
2 - 1" x 2" x 8' furring strips
1 - 1/4" x 1.5" x 8' pressure treated pine lattice strip
Weed control fabric
Kreg Jig
2 1/2 inch pocket screws
Brad nailer
Paint/Stain
Staples
Staple Gun
Total Cost:
around $25.00/per planter
Time:
2 - 3 hours

Cut list:
(20) - 22" cedar dog ear fence picket pieces
(4) - 20.5" cedar dog ear fence picket pieces
(4) - 24" 2" x 2" furring strip pieces
(8) - 17.5" 1" x 3" furring strip pieces (I would suggest laying out 5 of the cedar picket pieces side-by-side and measuring the width prior to making this cut. Better safe than sorry).
(4) - 24" 1" x 2" furring strip pieces
(8) - 11.5" 1" x 2" furring strips pieces with one end cut to 45 degrees (for the X's)
(4) - 20.5" 1/4" x 1.5" lattice pieces
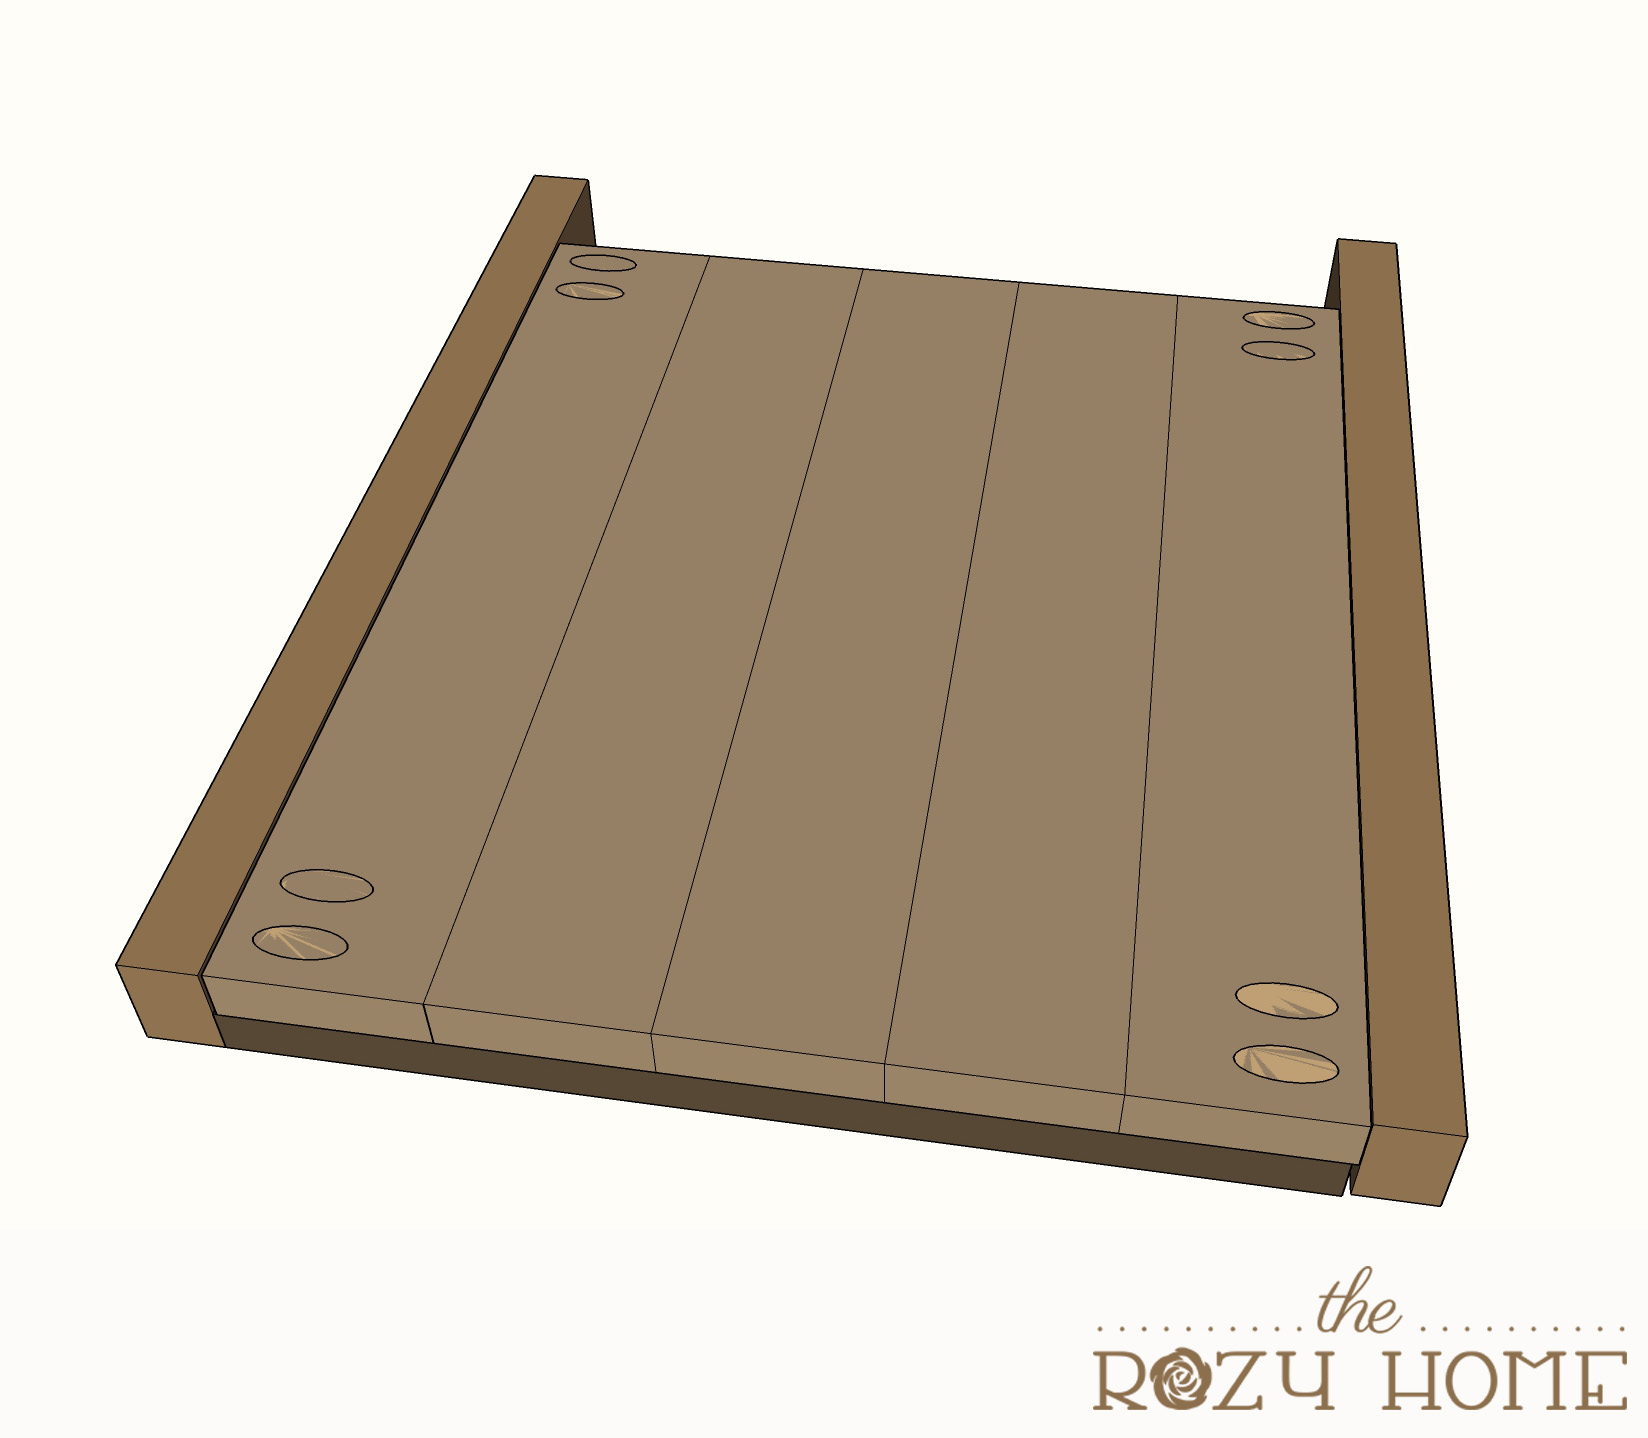
Step 1: Create side panels
Lay out 5 of the 22" cedar dog ear fence picket pieces out side-by-side. Attach a 17.5" 1" x 3" furring strip piece to the top and bottom of the pickets using a brad nailer. Repeat this 3 times (creating four side panels in total).


I found it helpful to lay each panel next to each other to make sure everything lined up.
Step 2: Attach the legs
Drill 2 pocket holes at the top and bottom of the first and fifth cedar picket piece on each panel. Select two panels and attach a 24" 1" x 2" furring strip on each side.

Attach the remaining two panels to the 24" - 1" x 2" furring strips.
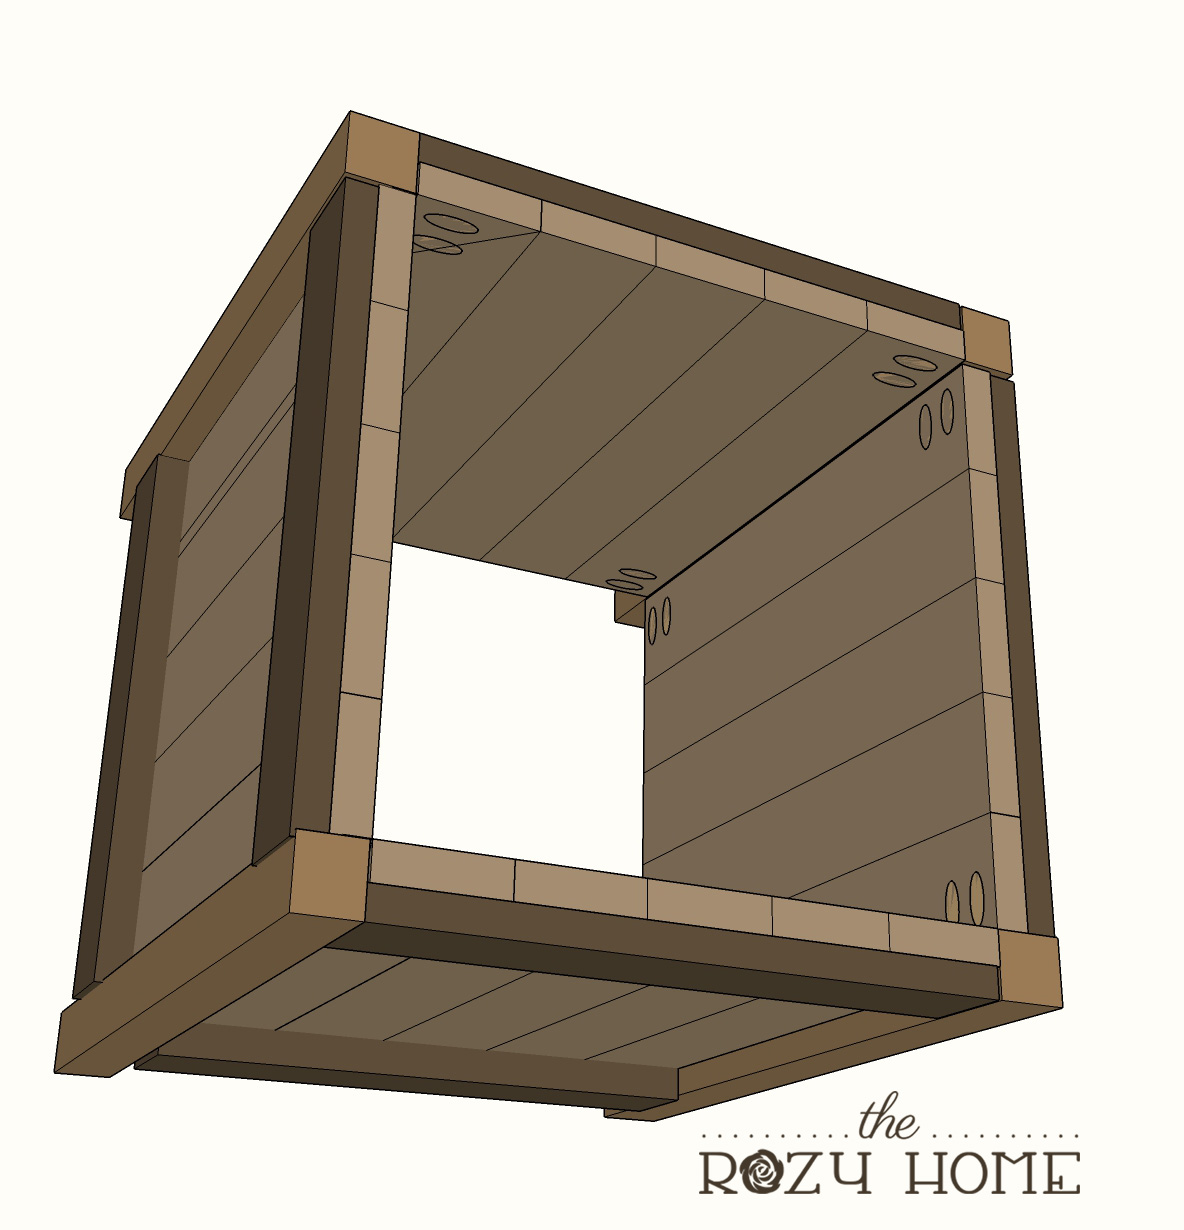
I propped up the sides to make it easier to attach the panels to the legs.

Step 3: Attach the support planks.
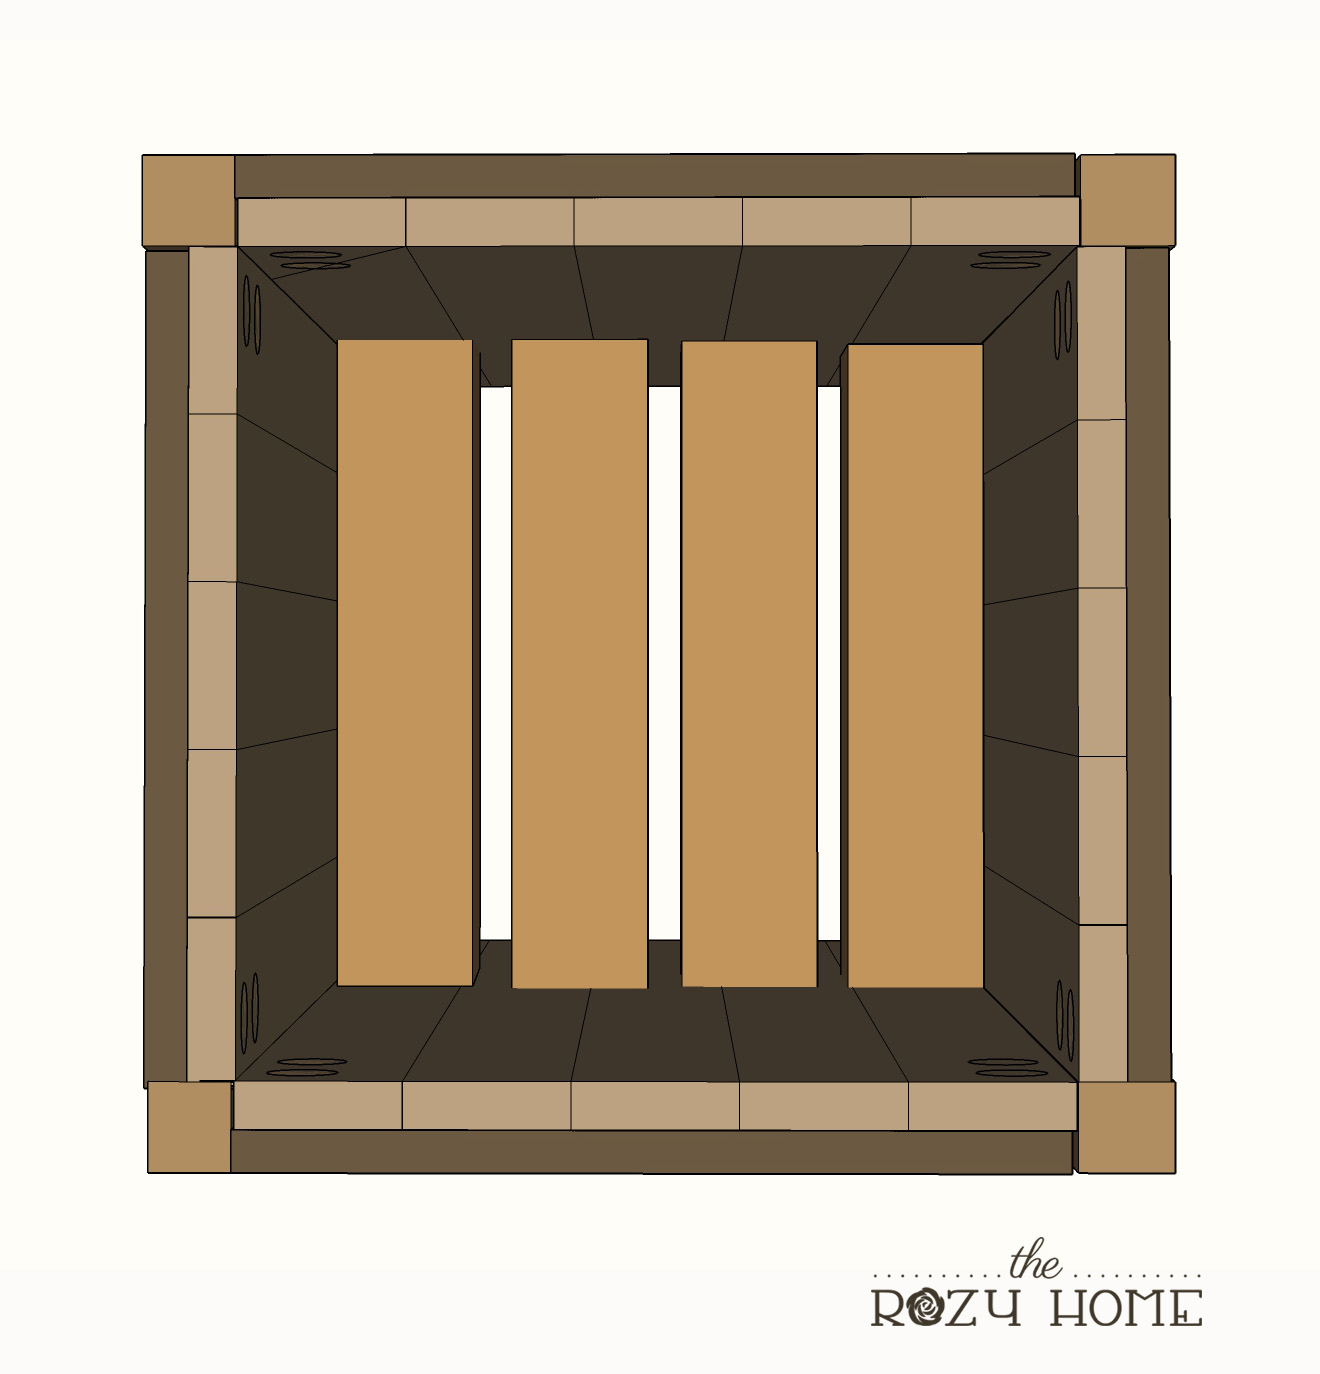
After determining the depth you prefer, attach the 4 - 20.5" cedar dog ear fence picket pieces. Make sure you space them out so that drainage will be created.
Step 4: Attach weed barrier liner.
Attach the liner using a staple gun (or brad nailer). Easy-peasy.
This is a terrible picture but it was the only one I could find and I wanted to show how I added the liner. A couple of things... I attached the lining before attaching the planks. That wasn't smart. On the second planter, I attached the liner after adding the planks. It worked much better this way and saved me from wasting liner. Also, I went back and pulled out the staples on the inside because you could see them. The staples on the top edge were plenty to keep the liner in.

Step 5: Add the X's.
This one is pretty self explanatory. It was hard to get the diagram perfect but you can see in the actual picture of the planter where the 45 degree angles rest (basically in the upper and lower corners).

Step 6: Attach lattice.
Attach the (4) 20.5" 1/4" x 1.5" lattice pieces to the top edge of the planter using a brad nailer. You want to attach the lattice last so you can cover up the staples from attaching the weed barrier. Please note this drawing does not show the weed barrier. It is something a bit difficult to capture in Sketch-Up.

Step 7: Paint/Stain
Paint/Stain the planter in your color of choice. Make sure you use an exterior paint/stain to ensure the color will not fade over time.
Step 8: Add plants and soil and enjoy!
This is the best part! Fill the planters with potting soil and the plants of your choice and enjoy! That's it!


I made mine over a year ago and they have withstood the Texas heat beautifully. A friend came over recently and asked where I bought them because she just loved them and I responded with "I made them for around $20. I'll make you some." They are a quick and easy way to bring a luxe look to your porch - and for only around $25!
Check me out at That DIY Party!
YOU MAY ALSO ENJOY:


