DIY RH French Window Pane Oversized Mirror
/Do you need a really oddly shaped mirror? Or perhaps you just don't want to spend money on a nice mirror. If you are like me, both of these were an issue. I needed a mirror that was roughly 55" H and 30" wide. I don't know if you've ever needed a mirror that size, but they are hard to find. And when you do find them they are expensive. I found one at Restoration Hardware that was the perfect size.

French Window Mirror courtesy of Restoration Hardware.
This particular mirror was 72" h, 30" w and a crazy 110 pounds. 110 pounds!!!!! Wow. Although it was the perfect size, the price? It came in a little under $1000. For a mirror (shakes head).
Of course I loved the mirror but paying that much for a mirror would probably result in a divorce. My husband is great about telling me to get what I love but $1000 for a mirror would be pushing it.
As usual, I looked at it for a bit, figured out what I needed to make one similar and headed to HD for supplies.
MATERIALS (for a mirror roughly 55"h x 30" w)
2 - 12" x 12" 6 pack plain edge mirror tiles (you can get these at Lowe's or HD for $9.99/pack)
2 - 2"x 2"x 8' Select Pine boards
2 - 1" x 2" x 8' Select Pine boards
3 - 8' pieces of cabinet trim
1 - 1/2" 2' x 4' MDF project panel
Clamps
Mirror mastic
Liquid Nails Heavy Duty Construction Adhesive
Paint tape
Cut list:
2 - 1" x 2" x 51" pieces cut at 45 degrees on each end
2 - 1" x 2" x 27 1/4" pieces cut at 45 degrees on each end
2 - 2" x 2" x 54 1/4" pieces cut at 45 degrees on each end
2 - 2" x 2" x 30 1/4" pieces cut at 45 degrees on each end
1 - 48" cabinet trim piece cut at 45 degrees on each end
1 - 47" cabinet trim piece
1 - 24" cabinet trim piece cut at 45 degrees on each end
6 - 11 1/4" cabinet trim pieces
2 - 54 1/4" quarter round pieces cut at 45 degrees on each end
2 - 30 1/4" quarter round pieces cut at 45 degrees on each end
Step 1: Attach the mirrors to the project panel
Using the mirror mastic, attach the mirror tiles to the project panel.

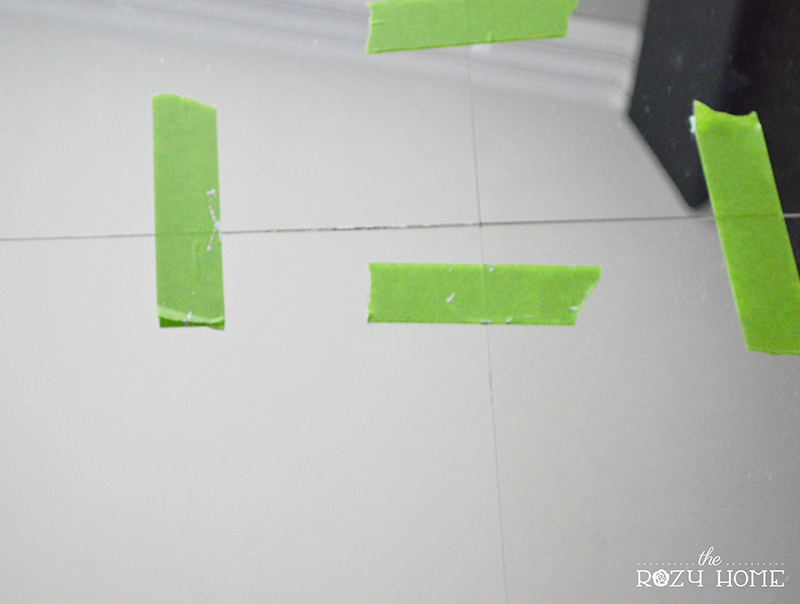
After applying all of the mirrors, use paint tape to attach them to each other. I do this to ensure they don't move around.
Step 2: Add trim on the sides
Apply liquid nails to the project panel and attach the 1" x 2" select pine boards.

Use clamps to ensure there is a good bond.

Next, attach the cabinet trim pieces to the mirror. Begin by gluing the 47" piece along the center of the mirror and then attach the 11 1/4" pieces where the mirror edges butt up to each other. Tape the pieces to the mirror to help it bond. Don't worry if the glue seeps out. It can be easily removed with a razor when it's dried.

Next attach the the 48" and 24" cabinet trim to the edges of the mirror. Again I used tape to help the trim bond.

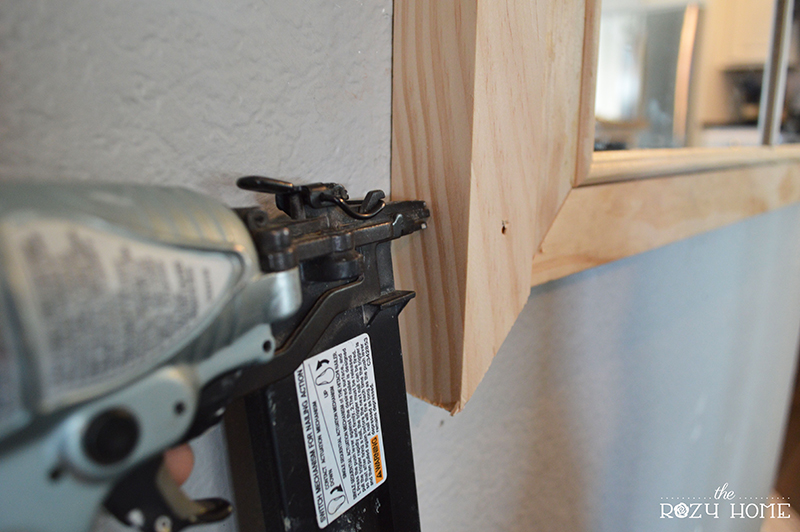
Using either glue or a brad nailer, attach the 2" x 2" trim to the mirror.
Attach the quarter round to the edge of the 2" x 2" trim.

Fill in any holes with wood filler, sand, paint and that's it!

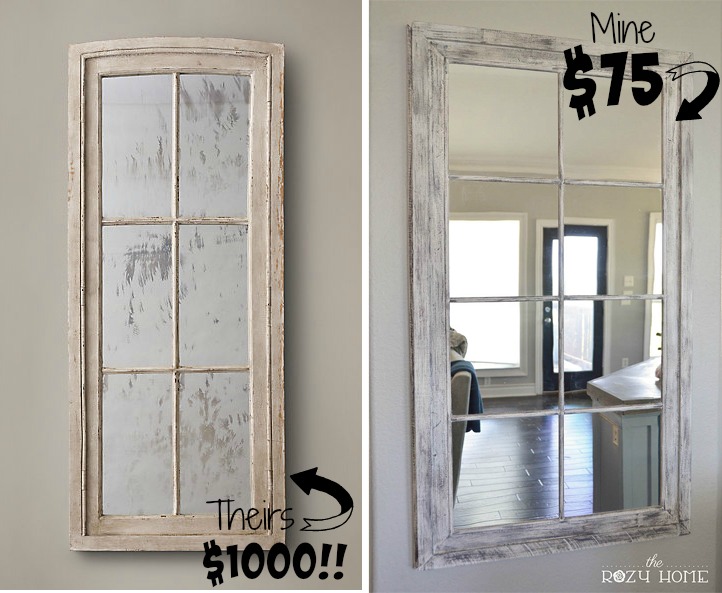
The entire project came in around $75. I know that isn't exactly cheap, but considering how massively huge it is, I thought it was a good cost. Of course, compared to the $1000 mirror from RH, I'll take my $925 savings and call it a win!
Check me out at the Think and Make Thursdays and Your Time To Shine!
YOU MAY ALSO ENJOY:


