A Better First Impression
/
I've always heard that you only have one chance to make a good first impression. When our realtor showed us our house three years ago my first impression was "wow... this needs work." And to be honest with you, I wanted to turn around and run. But I didn't. I headed up the stairs (which were covered in blue outdoor carpet) and into the living room. There was tile as far as the eye could see. I knew what a pain it was to pull tile so that was strike two for the house. But then something magical happened - our realtor (the beautiful Cara Keenan from Realty Austin) took us out onto the back deck. Instantly everything bad about the house disappeared. You see, growing up in Texas I had been surrounded by flat land my whole life. I had always loved trees, rolling hills, lakes. Yet living in the Dallas area, there was little of that to be found. But I wasn't in Dallas any longer - I was in the beautiful Texas Hill Country. And boy did this house make you well aware of that. We walked out on the deck to find this:


Before we started looking for houses I told my husband I wanted a lake view. He insisted on a view of the hills. Imagine our delight when we found a house that had both! I was in love and I made the decision then to make this house our home.
Over the years I've done quite a few things, but my latest project tackled making a better first impression. I wish I would have known three years ago that I was going to blog about all of this because I would have taken better pics. I did manage to scrounge up a pic of the entryway from around the time we moved in.
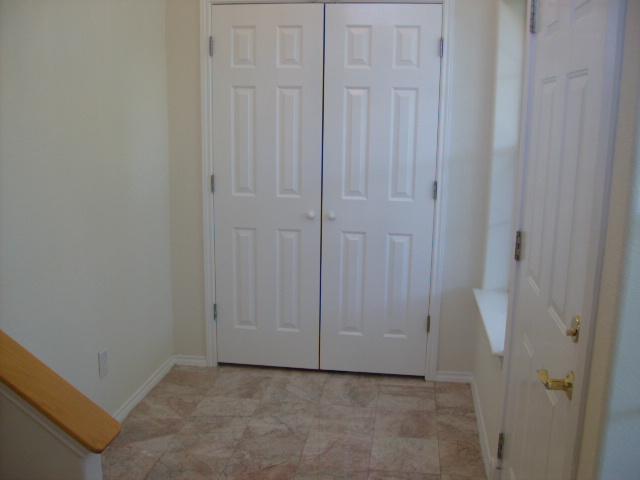
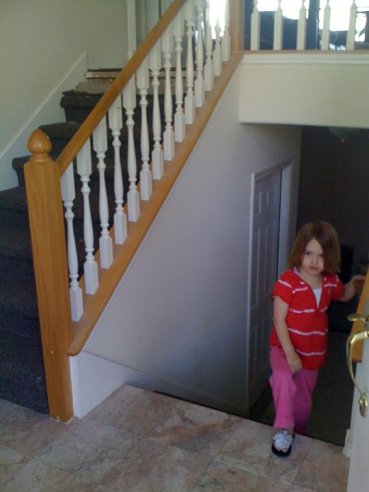
As you can see, the flooring was a pink "marble" tile (it was ceramic made to look like marble). The stairs (which, coincidentally, were the only surface in the house not covered by tile) were covered in blue outdoor carpeting. The stair railing was a yellow oak with white spindles. And I'm not sure if you can see, but there is a nice brass door handle on the front door. Now I know what you are thinking "Jill, that was the style in the late 80's and 90's". It was and you are right...but our house was built in 2001!
For the first two years we lived here whenever someone would come to the door, I would barely crack it open. My daughter's friend's parents probably all thought I was crazy, but I just didn't want the ugly sitting behind the door to make an appearance.
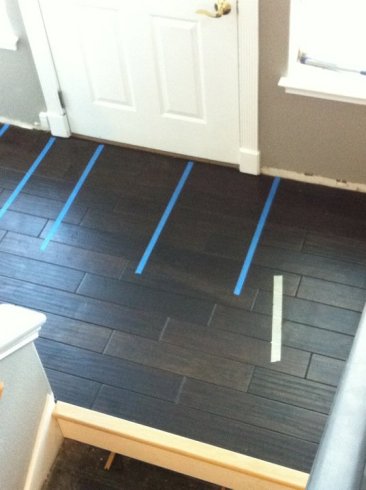
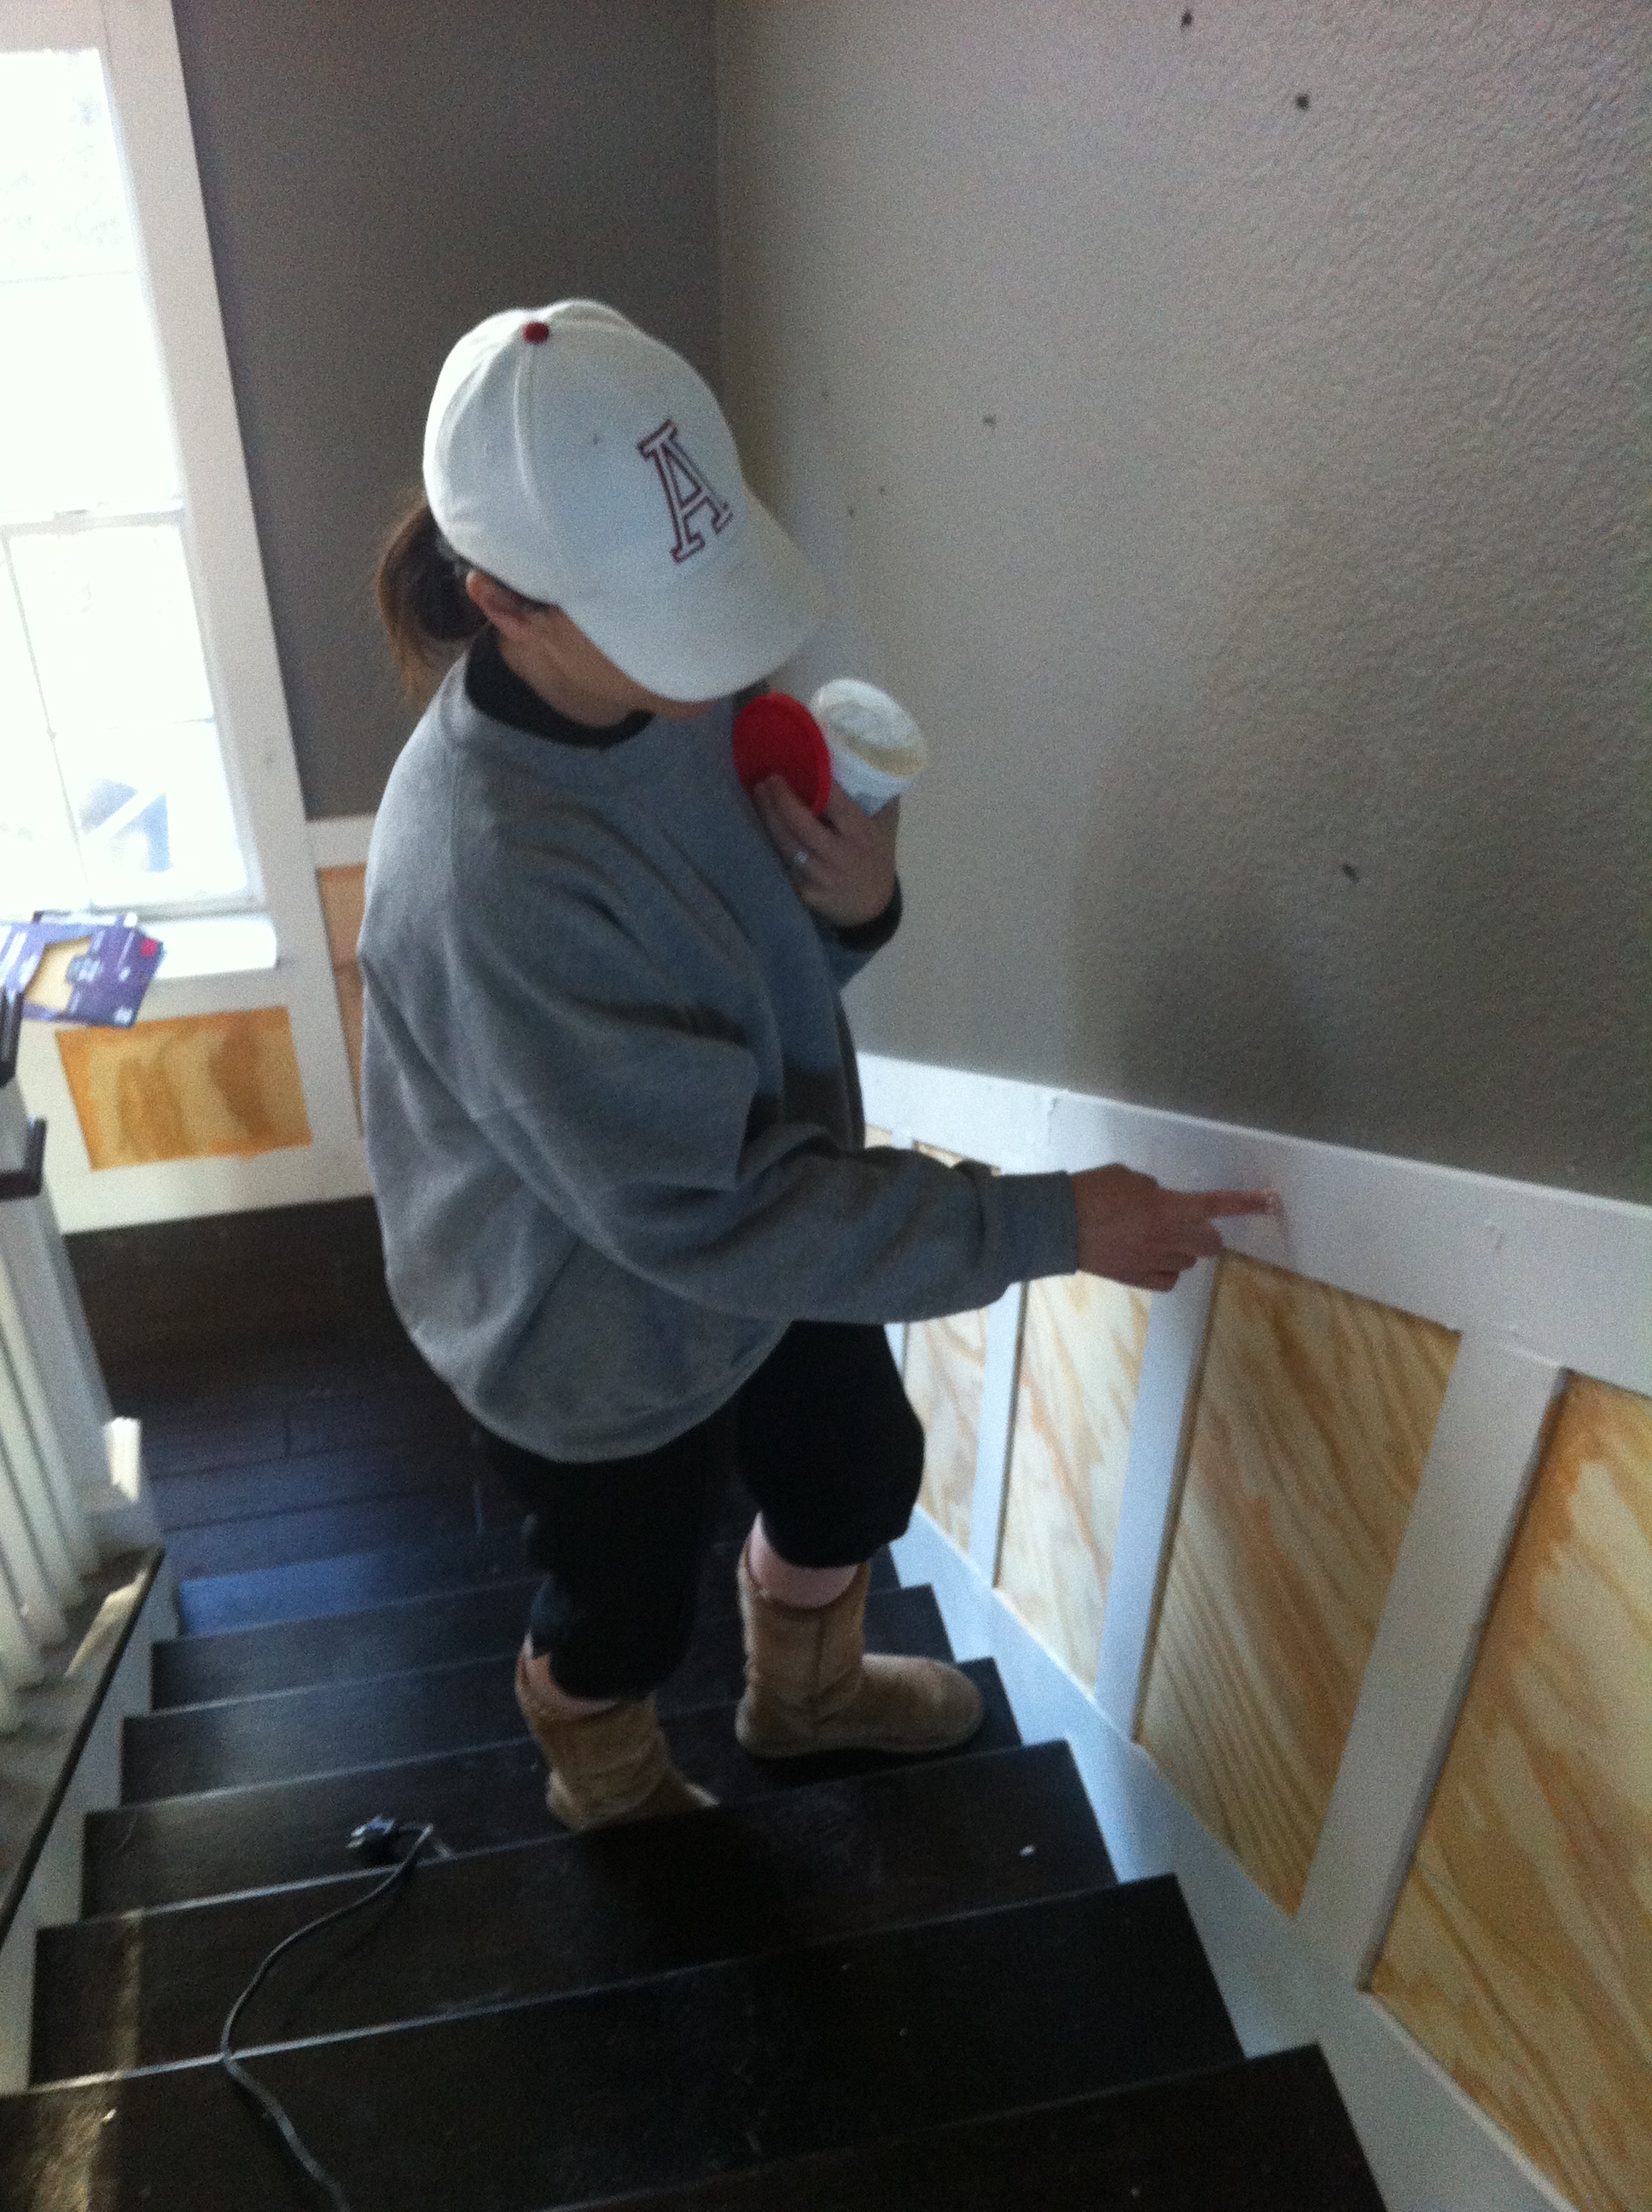
When I finally decided to do something about the entry I began by demoing the tile and then installed the same hardwoods from upstairs (so the house would have a flow).
Over the next two years I worked on the stairs. I ripped off the carpet, pulled out the make shift stairs treads and replaced them with treads I had stained to match the hardwoods. Next I added new white risers. Well, that's not entirely true. Somewhere in this process I thought it would be cool to have travertine in the entry and on stairs. Lets just say we can file that one under epic fail. So anyhoo... after the risers went in I painted the stair railing thinking a nice coat of paint would make all the difference. I was wrong - they needed to be replaced.
For the next few months I researched how to replace stair railing and decided I wasn't DIY savvy enough to take that one on, so I called my handy GC John. After a couple of days I had new stair railing that I loved! Even better - this is the first time I was really proud of myself for the savings versus quality.
Before starting the project I looked everywhere for newel posts. They were so expensive! After about the 100th site I visited I came across a listing for newel posts on Lowes.com. I checked it out - solid wood, stainable and about 50% less than the next cheapest post I had found. I told John about them. He warned me they were probably going to be hollow at that price but to give it a try (my newel posts from Lowe's: http://www.lowes.com/pd_408755-1487-4091+POPLR_0__?productId=3713352&Ntt=newel+posts&pl=1¤tURL=%3FNtt%3Dnewel%2Bposts&facetInfo=)
A couple of days later John brought them over. I could tell by the labored look on his face while he carried the box the posts were definitely not hollow. They ended up being an excellent score. They were solid wood and while the other posts were coming in around $250 each these were on sale for $89! I needed three so I ended up saving $180 on a $500 project!!
Okay so back to the project. After John finished up, I was left with this:
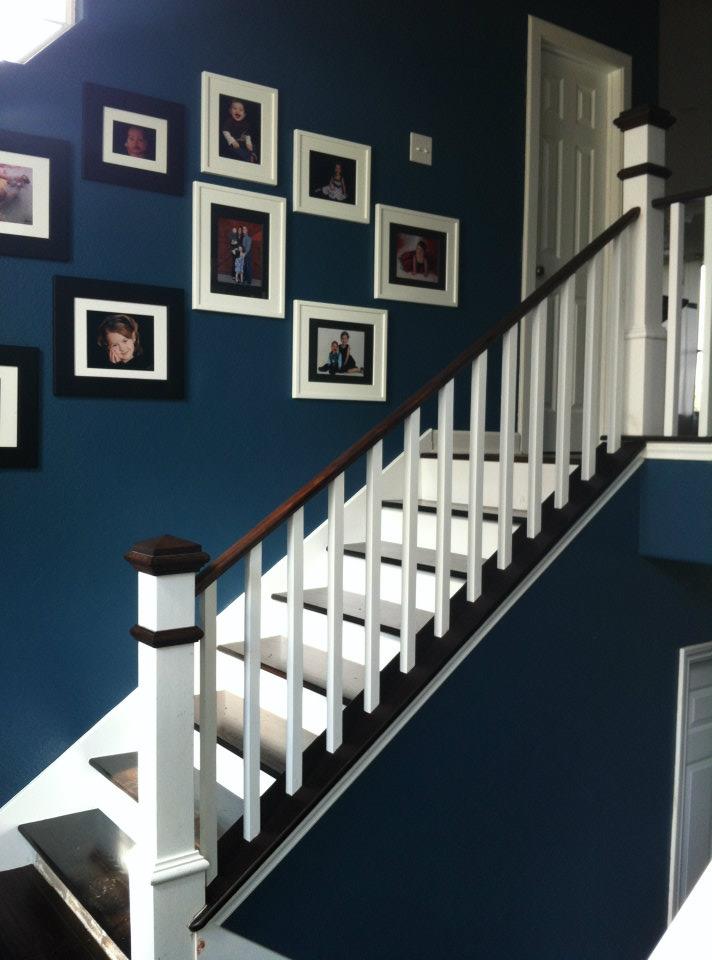
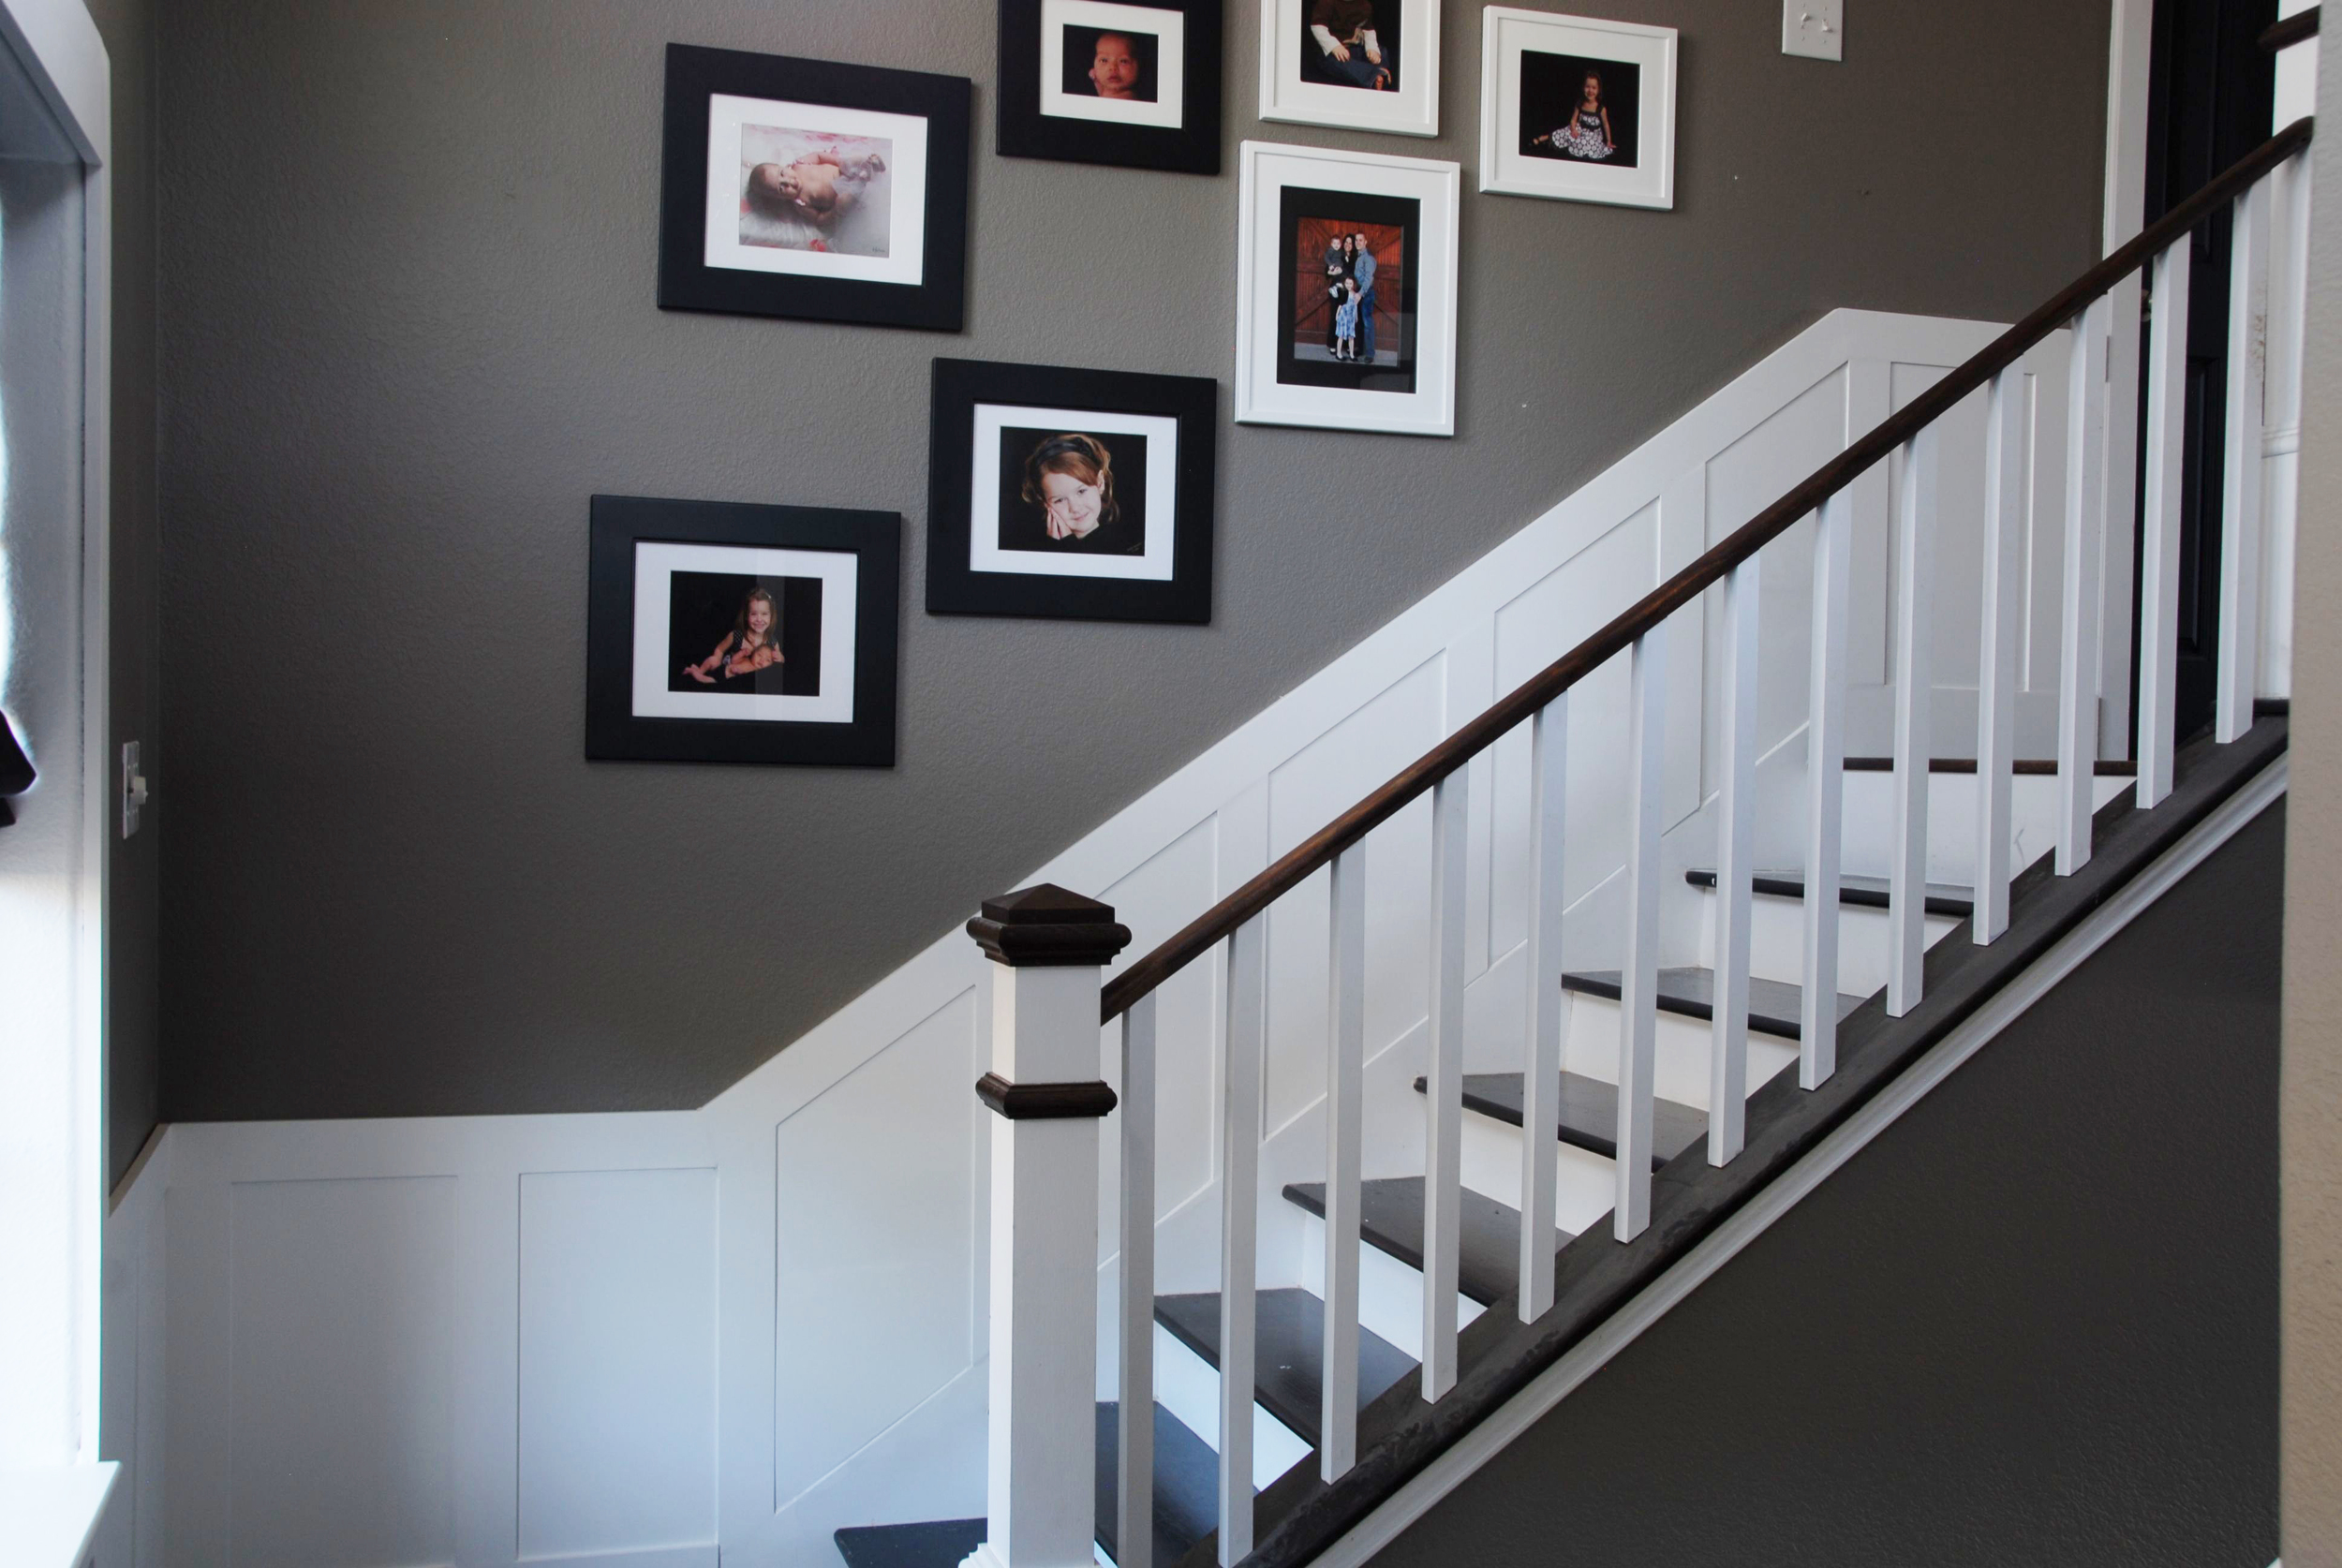
Better, right? Well maybe except for the blue paint. My husband made a comment one day regarding the lack of color in our home. I was in a blue phase so this is what I came up with and this is where my house stayed for about a year. Then one fateful day, my mom and I went to Restoration Hardware. As she shopped I looked at their beautiful slate walls and realized I missed having a nice, neutral wall. On a whim I grabbed two gallons of Restoration Hardware Slate paint and went home to start painting.
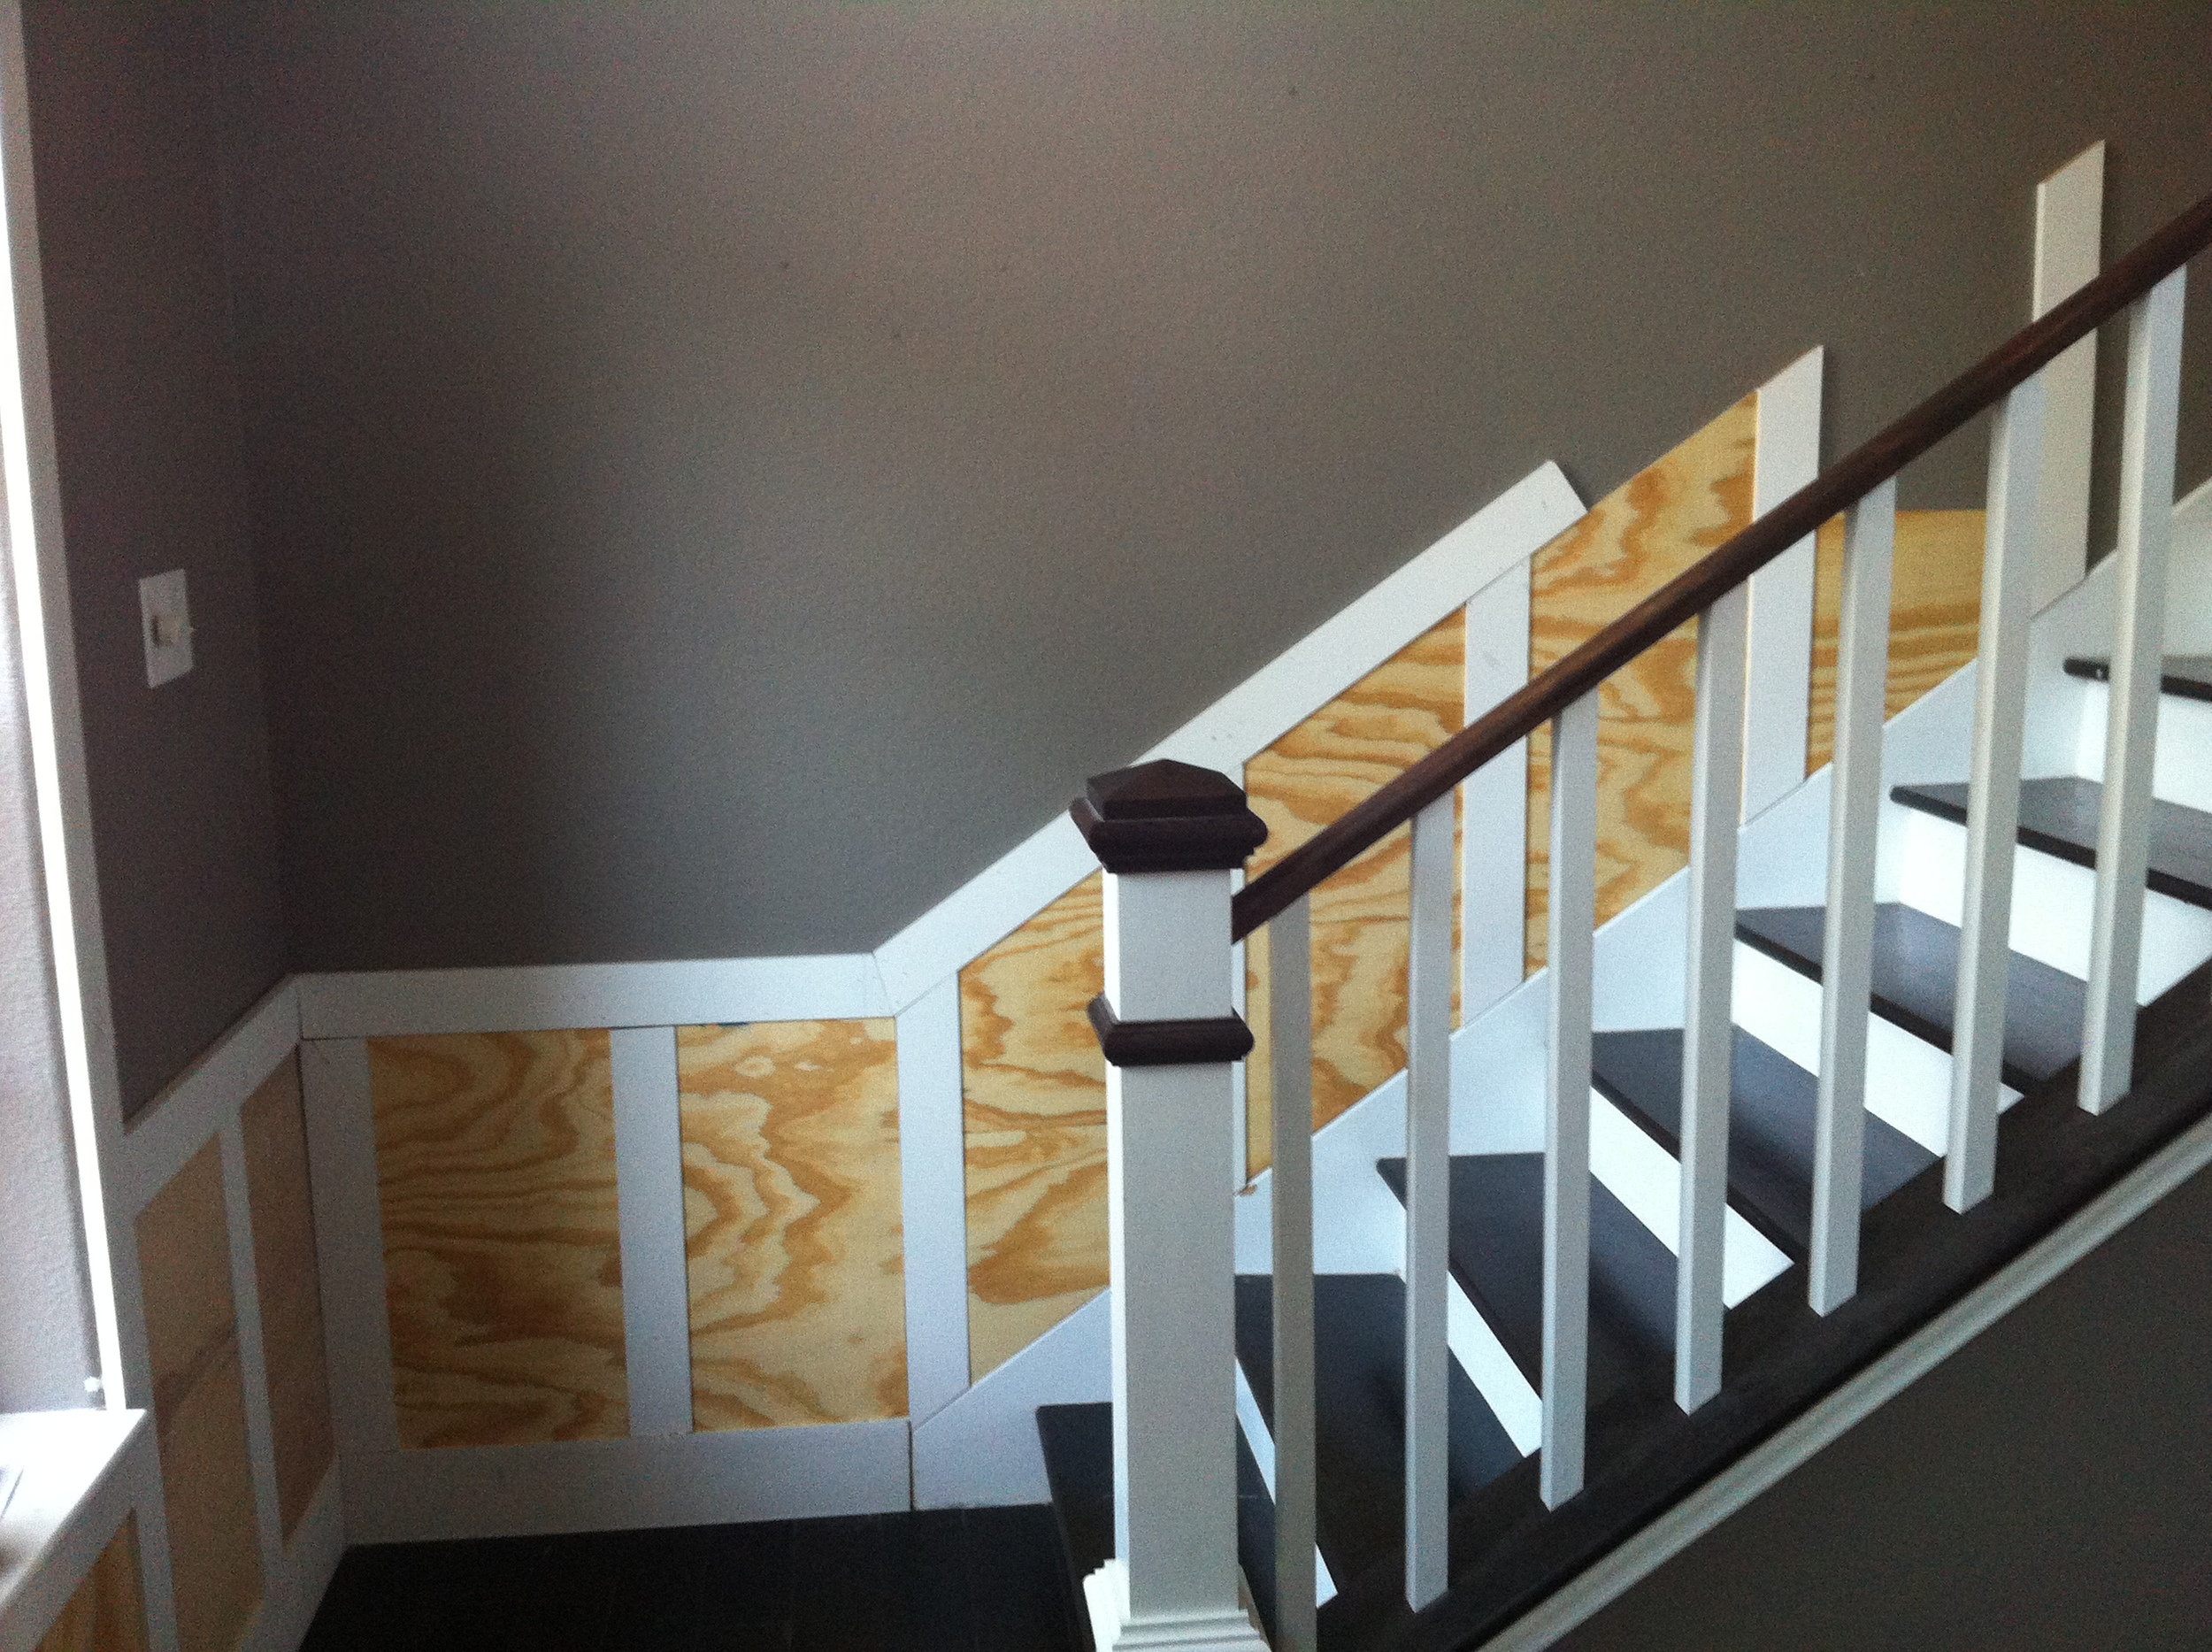
For the next two days I marveled at how much better the entry looked. So calm, so pleasing. And then my son attacked. One of his favorite things to do is throw toys from the tops of the stairs. We fuss at him and tell him to stop but he's a three-year-old boy and that is just what they do. Within a day, I had a huge hole in my sheetrock from one of his toys. Frustrated I decided I needed to figure out what I could do to save my walls. Somehow that led me to The Joy of Moldings. I'm a fan of wainscoting but not the traditional stuff (the wainscoting with all the lines). It looks nice in other people's homes, but doesn't quite work for me. So, while fishing around for a better alternative I found this tutorial http://thejoyofmoldings.com/wainscoting-100/. I knew this was what I wanted instantly. The next day I headed to Lowe's for materials and got to work. If you've been following along you've seen the progress in my other posts. If not, here it is:
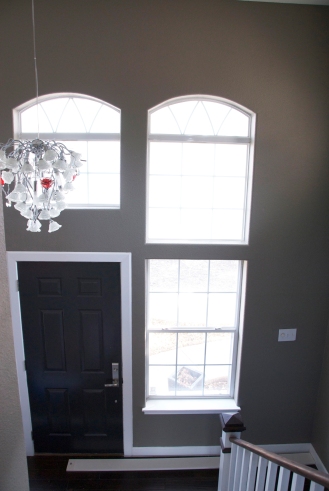
And the final product?
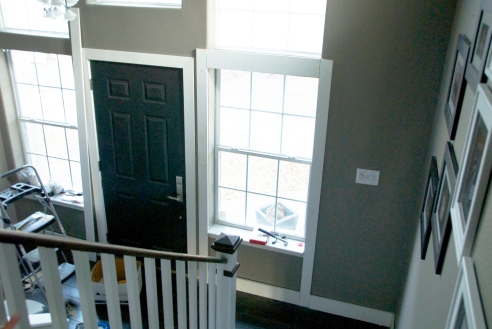
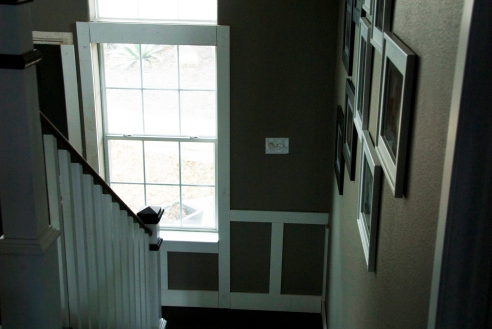
So from this:
To this:
To this:
Quite a difference don't you think? I still have need to do the upper windows (I should have my arch trim by this weekend) and need to add crown to the door and trim pieces at the door seams but it's almost there! I'm so excited to see the transition and I feel like it's finally starting to come together. Slowly but surely we are getting there.


