Updated: Making Your Own Window Grids (Grilles, Mullions)
/
Updated 12/21:
After Hometalk shared this post I got a ton of emails and comments regarding cleaning the windows. I decided to figure out a way to make them easily removable and yeah, it was easier to do it that way than the way I've listed below. So.... The updated post is below with the option to make them removable.
I also received an email from a reader who said her window cracked after applying the grids to the window. She thought perhaps the windows got too hot with the grids on. One of the awesome things about working in construction is I have experts I can call about these types of things. After sharing the tutorial with them and learning they offer the same type of product (but with steel instead of poly), they said it sounds like the glass may have been cracked when pressing the adhesive to the window. They stated that this is more likely to happen on single pane, non-tempered or windows older than 10 years. They stated they didn't want to say it was impossible the grids made it so hot it would crack but it was "very, very unlikely" since the steel version of the same concept has never cracked a window and steel gets much hotter. With all of that, I still want to recommend extreme caution when applying the grids to the windows.
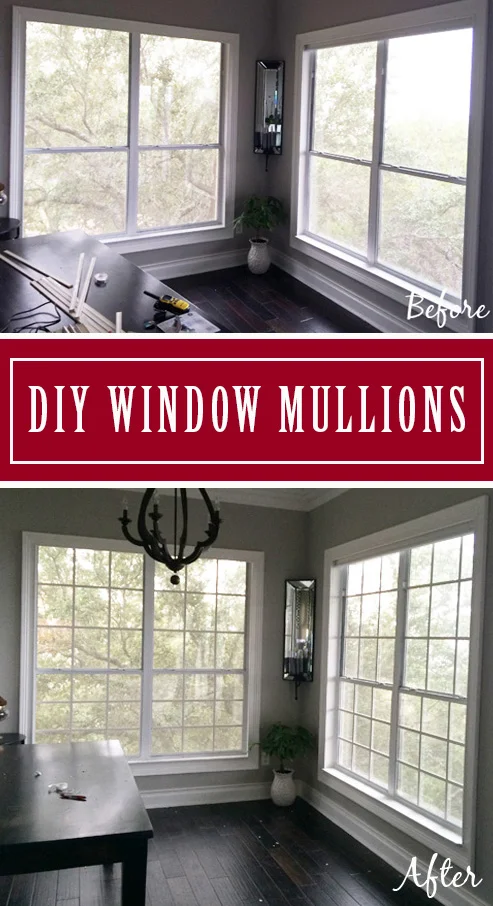
Hi everyone! I wanted to list this as another dining room update, but I know most people are wanting to know about the window grids, grilles, mullions - whatever you call them. This project is the result of a little OCD and a lot of "there still is something missing in the dining room." Luckily, the latter and the former came into perfect harmony yesterday when I had my ah ha moment. I realized that I wanted to do grids on the window. Every window on the front of the house (even the little windows) have grids. In contrast, every window on the back and side did not. At first I thought they went this route because they wanted to enjoy the view. I mean, the view is why we bought the house. The more I thought about it, though, the more I realized they did it to be cheap. You see, if you really wanted to enjoy the view, you would pick windows without huge dividers going through them. After all, it's hard to marvel at God's beauty when you are staring at a bar. And truth be told, it has driven me crazy since we moved in. It just looks so undone.
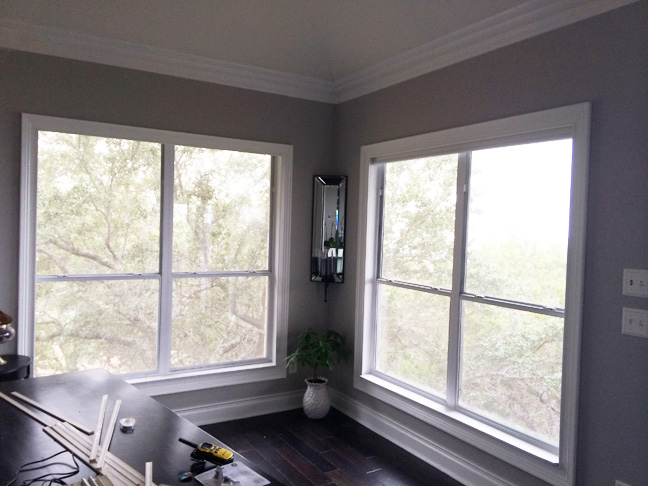
With this in mind I decided to add my own window grids. Since I had never done it before I googled DIY Window Grids, DIY Window Grilles, DIY Window Mullions - you name it. I found tutorials that either a. were too complicated or b. looked really, really cheap. So I did what I normally do with projects - drank coffee and just thought on it. First things, first. I walked around and looked at the windows on the front of the house. What I realized is that the grids were simply made up on two vertical pieces and 6 horizontal pieces. The hard part was trying to figure out what to make them out of. Off to Home Depot...
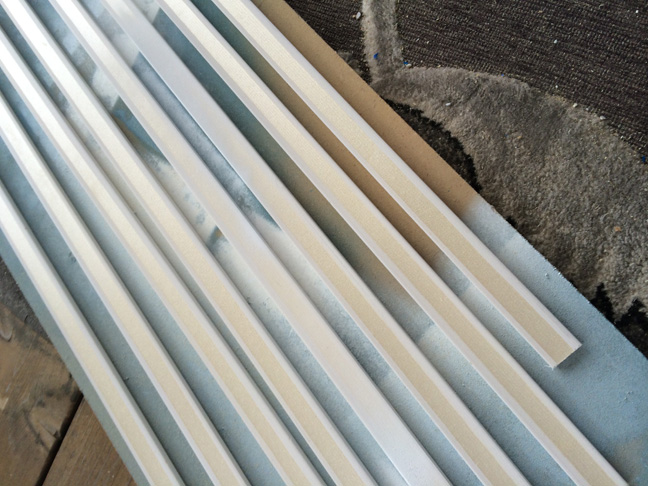
While at HD I looked at a ton of trim. I thought about wood. The only problem is that the pieces on the front are not wood so they wouldn't match. After a bit of searching I came up with these:

Not only was it the right width, but at $2.38 for 8 feet, it was priced right. I knew my windows were 32 inches wide and 72 inches tall and there were 4 total and somehow decided I needed 16 pieces (which, by the way, was too much. Turns out I only needed 12 pieces).
When I got home the first thing I did was decide how wide apart I wanted the vertical pieces. I decided on two vertical pieces that were spaced about 10 1/4 inches apart. Next I decided how many horizontal pieces I wanted. For that, I opted for three rows. Having figured that out, I measured the length from the top of the window to the bottom (just the glass part). I made those cuts and attached them to the window with double sided tape. This allowed me to accurately measure the length of the horizontal pieces. After figuring that out, I went and cut 48 (yes 48!) horizontal pieces and the remaining vertical pieces.
After cutting the pieces, I took them out in the garage and spray painted the back. This wasn't really necessary because no one will see the back of them, but I decided to "do it right."
Here's the thing about spray painting poly - it takes at least three coats to cover it. I used Rustoleum 2X and it still took 3 coats.
Updated segment:
For those who want to make them grids removable (for easy cleaning) do the following:
After deciding how far apart you want each grid, measure from the bottom of the grid up and mark the spot. For example, I wanted mine spaced 8 1/2 inches apart, so I measured 8 1/2 inches from the bottom and marked it. Make sure you use a square or straight edge and draw the line across the entire piece. This will help when attaching all pieces to the main vertical stile.

HELPFUL HINT: PLACING A HORIZONTAL STILE AT THE BOTTOM (BETWEEN EACH VERTICAL STILE) WILL ENSURE YOUR MEASUREMENTS ARE EQUAL. TRUST ME ON THIS... YOU SHOULD DO THIS.

DRAW A LINE ACROSS THE VERTICAL STLE TO MARK PLACEMENT OF THE HORIZONTAL STILE.
Place hot glue on the end of the horizontal stile and attach it to the vertical stile. Repeat on the other side. Helpful hint: Start on the center horizontal stiles first. It will make the grids more stable.
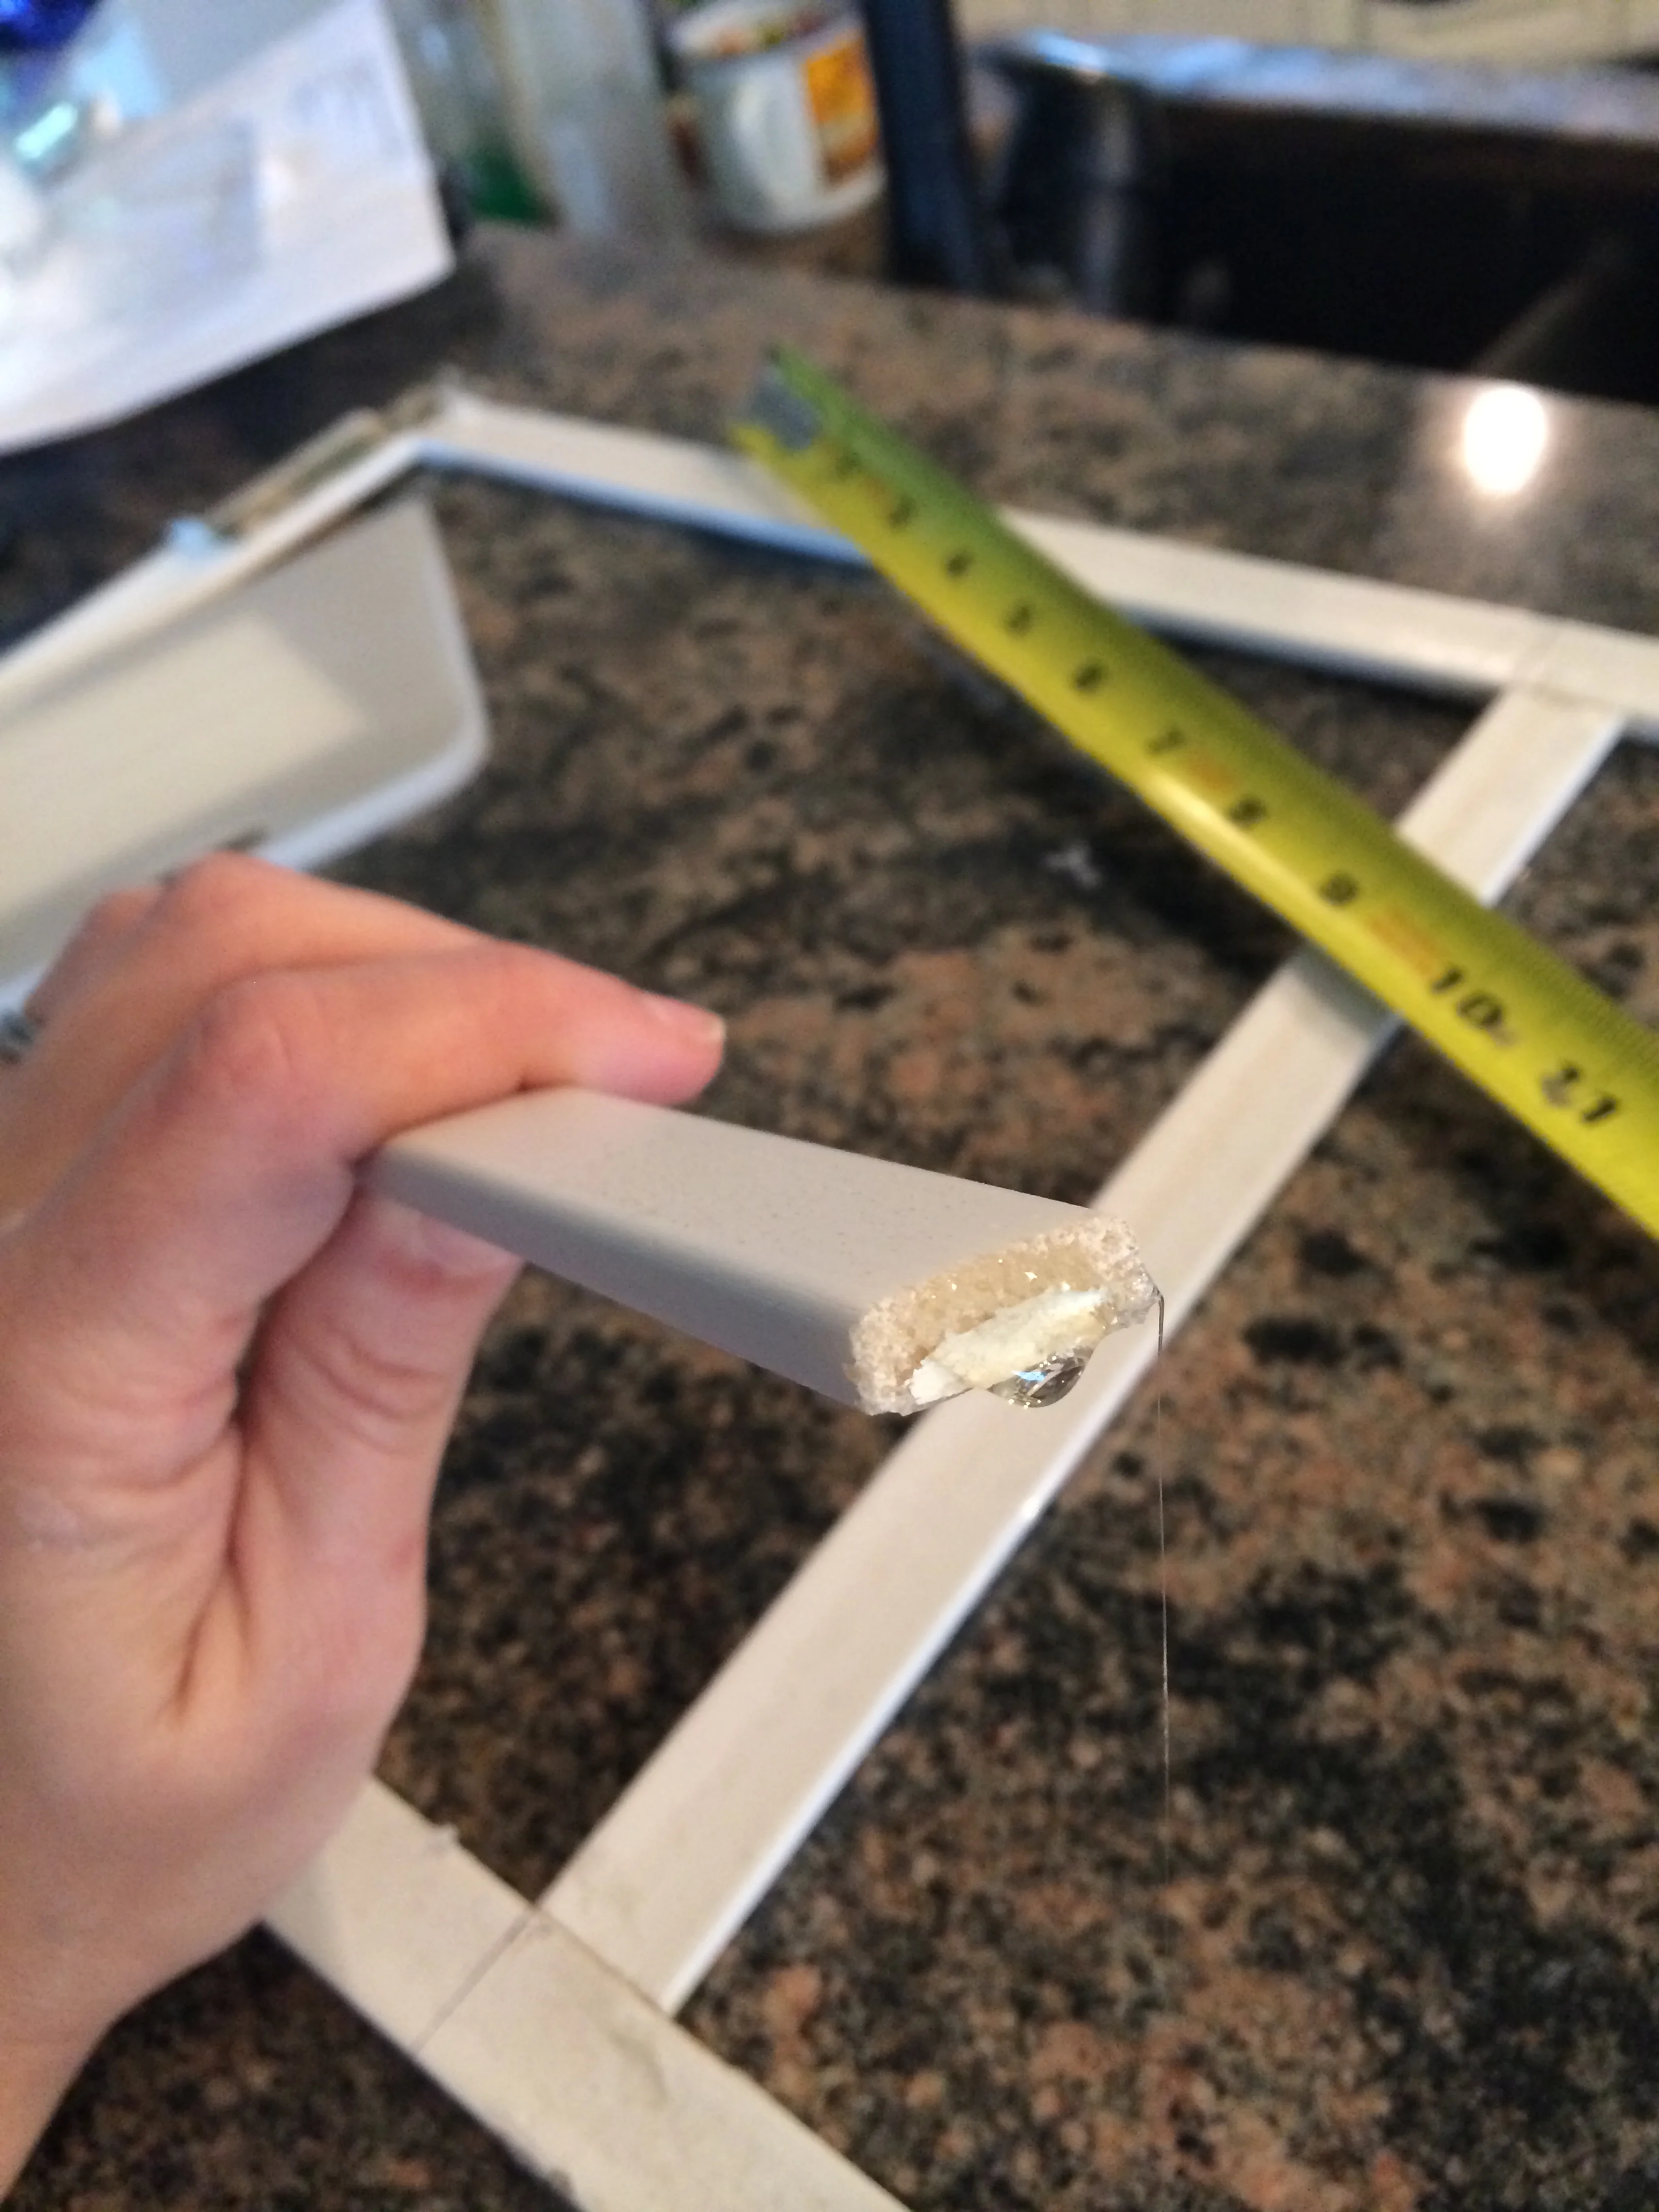


Repeat the steps on the left and right sides. Allow the grids to sit for about 15 minutes. Although it isn't necessary, it allows the glue a bit more time to form a bond.
To attach the grids to the windows, I purchased double-sided/mounting tape from Ace. I initially was nervous to use it because of the cat, but it's been working great.


So there you have it! Easy peasy.
For those who want to permanently attach them to the windows, read on...
Now it was time to attach them to the window. Now, this is where it comes down to personal preference. Keep in mind that no one will see these close up at my house. With that in mind, I opted for hot glue. May sound like an odd choice, but I've used it on glass before and it creates an amazingly strong bond. As long as you use it on a low setting, it will be fine. Keep in mind, though, that it will leave a little dot on the window. You would have to get really, really close up to see the dot, but there is a dot there none the less. The other option is to use a really good double-sided tape. I actually used double-sided tape when I was laying it all out and it was very hard to see outside. The reason I didn't stick with this is because I knew the cat would be able to pull them off rather easily.

The other option is to glue all the pieces together for each window and then attach them to the windows. Your choice. I decided to attach them directly to the window because it allowed me to check for level and such. When I do them for the windows in the living room, however, I will probably just put them together all at once and then attach them.
I guess I should add here that the horizontal pieces simply butt up to the vertical pieces. There are no special, or unique cuts needed for this.
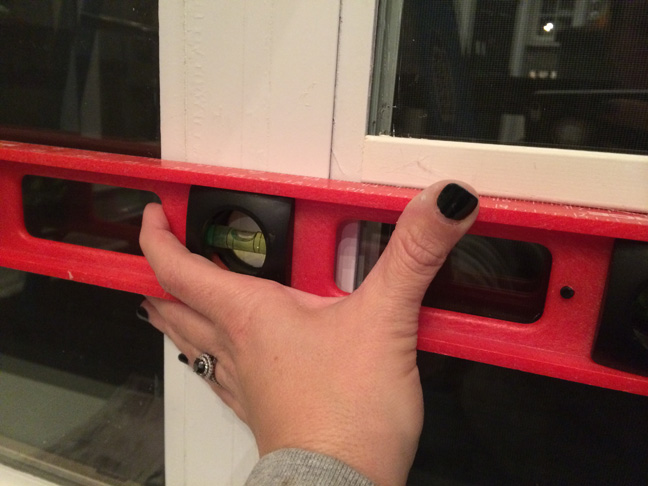
I would really recommend using a level on this project. I couldn't find my small level, so I had to make due with the larger one. If you don't have a level, just use your tape measure to measure from the bottom to the top of both sides to make sure they are even.
From start to finish, it took a full day. The longest part of all of that was waiting for the paint to dry. The rest of it (measuring, cutting, gluing) took about 3 hours. And the results? Check them out!

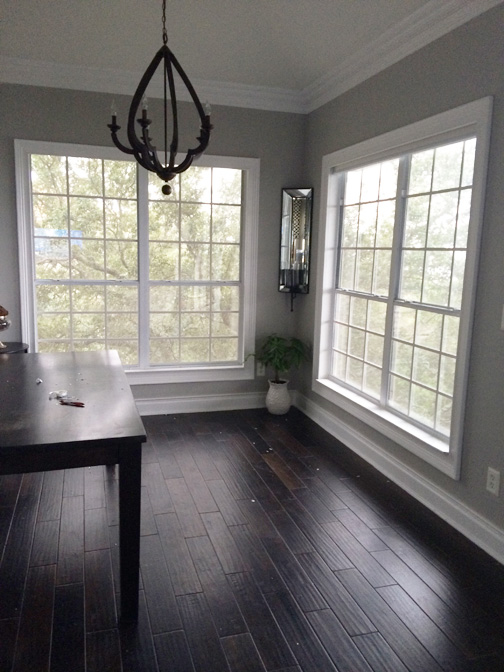
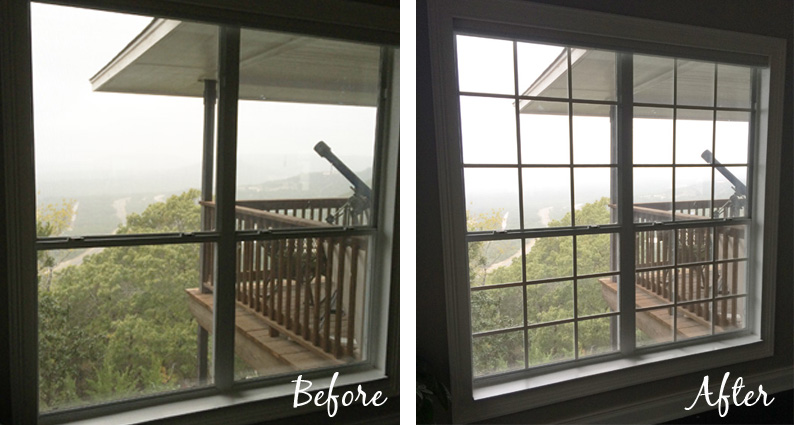
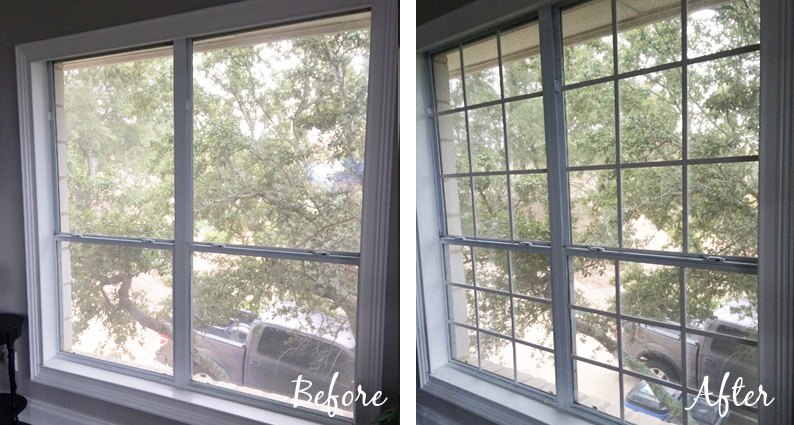
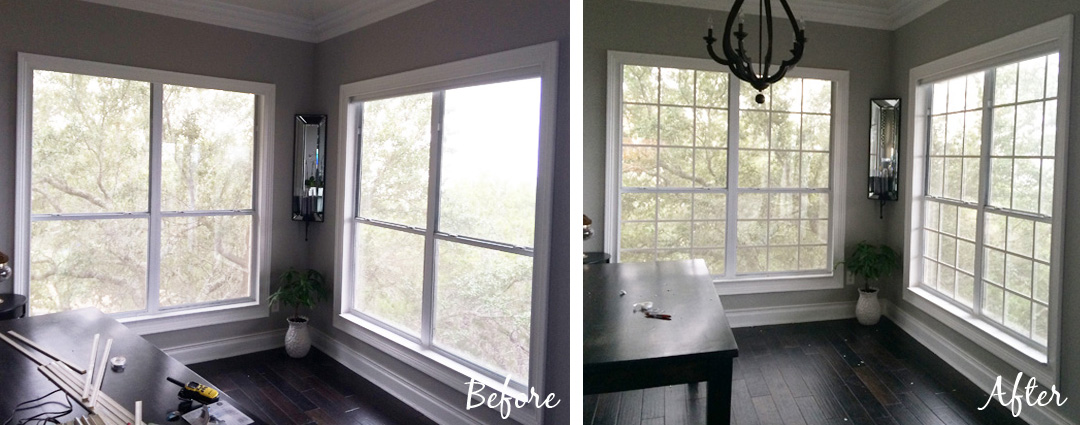
Sorry about the lighting. As you can see in the first pic, I didn't have a light when I took the before photos. It was also a rainy day. While I worked on the windows, my Hubs hung the new light. ;-)
The total cost of the project (including the paint) was $35 which breaks down to around $9 a window. Not a bad way to add some character to boring windows. :-)


